

One of the superstar Pre-Sales Systems Engineers on my team was in a customer meeting not too long ago, walking through what was, by all accounts, a well-run environment. The team knew what they were doing, the infrastructure was stable, and nothing stood out as particularly problematic. It was one of those conversations where everything feels “fine,” which in our world usually means there are inefficiencies hiding in plain sight.
Then he started asking questions about enterprise file services.
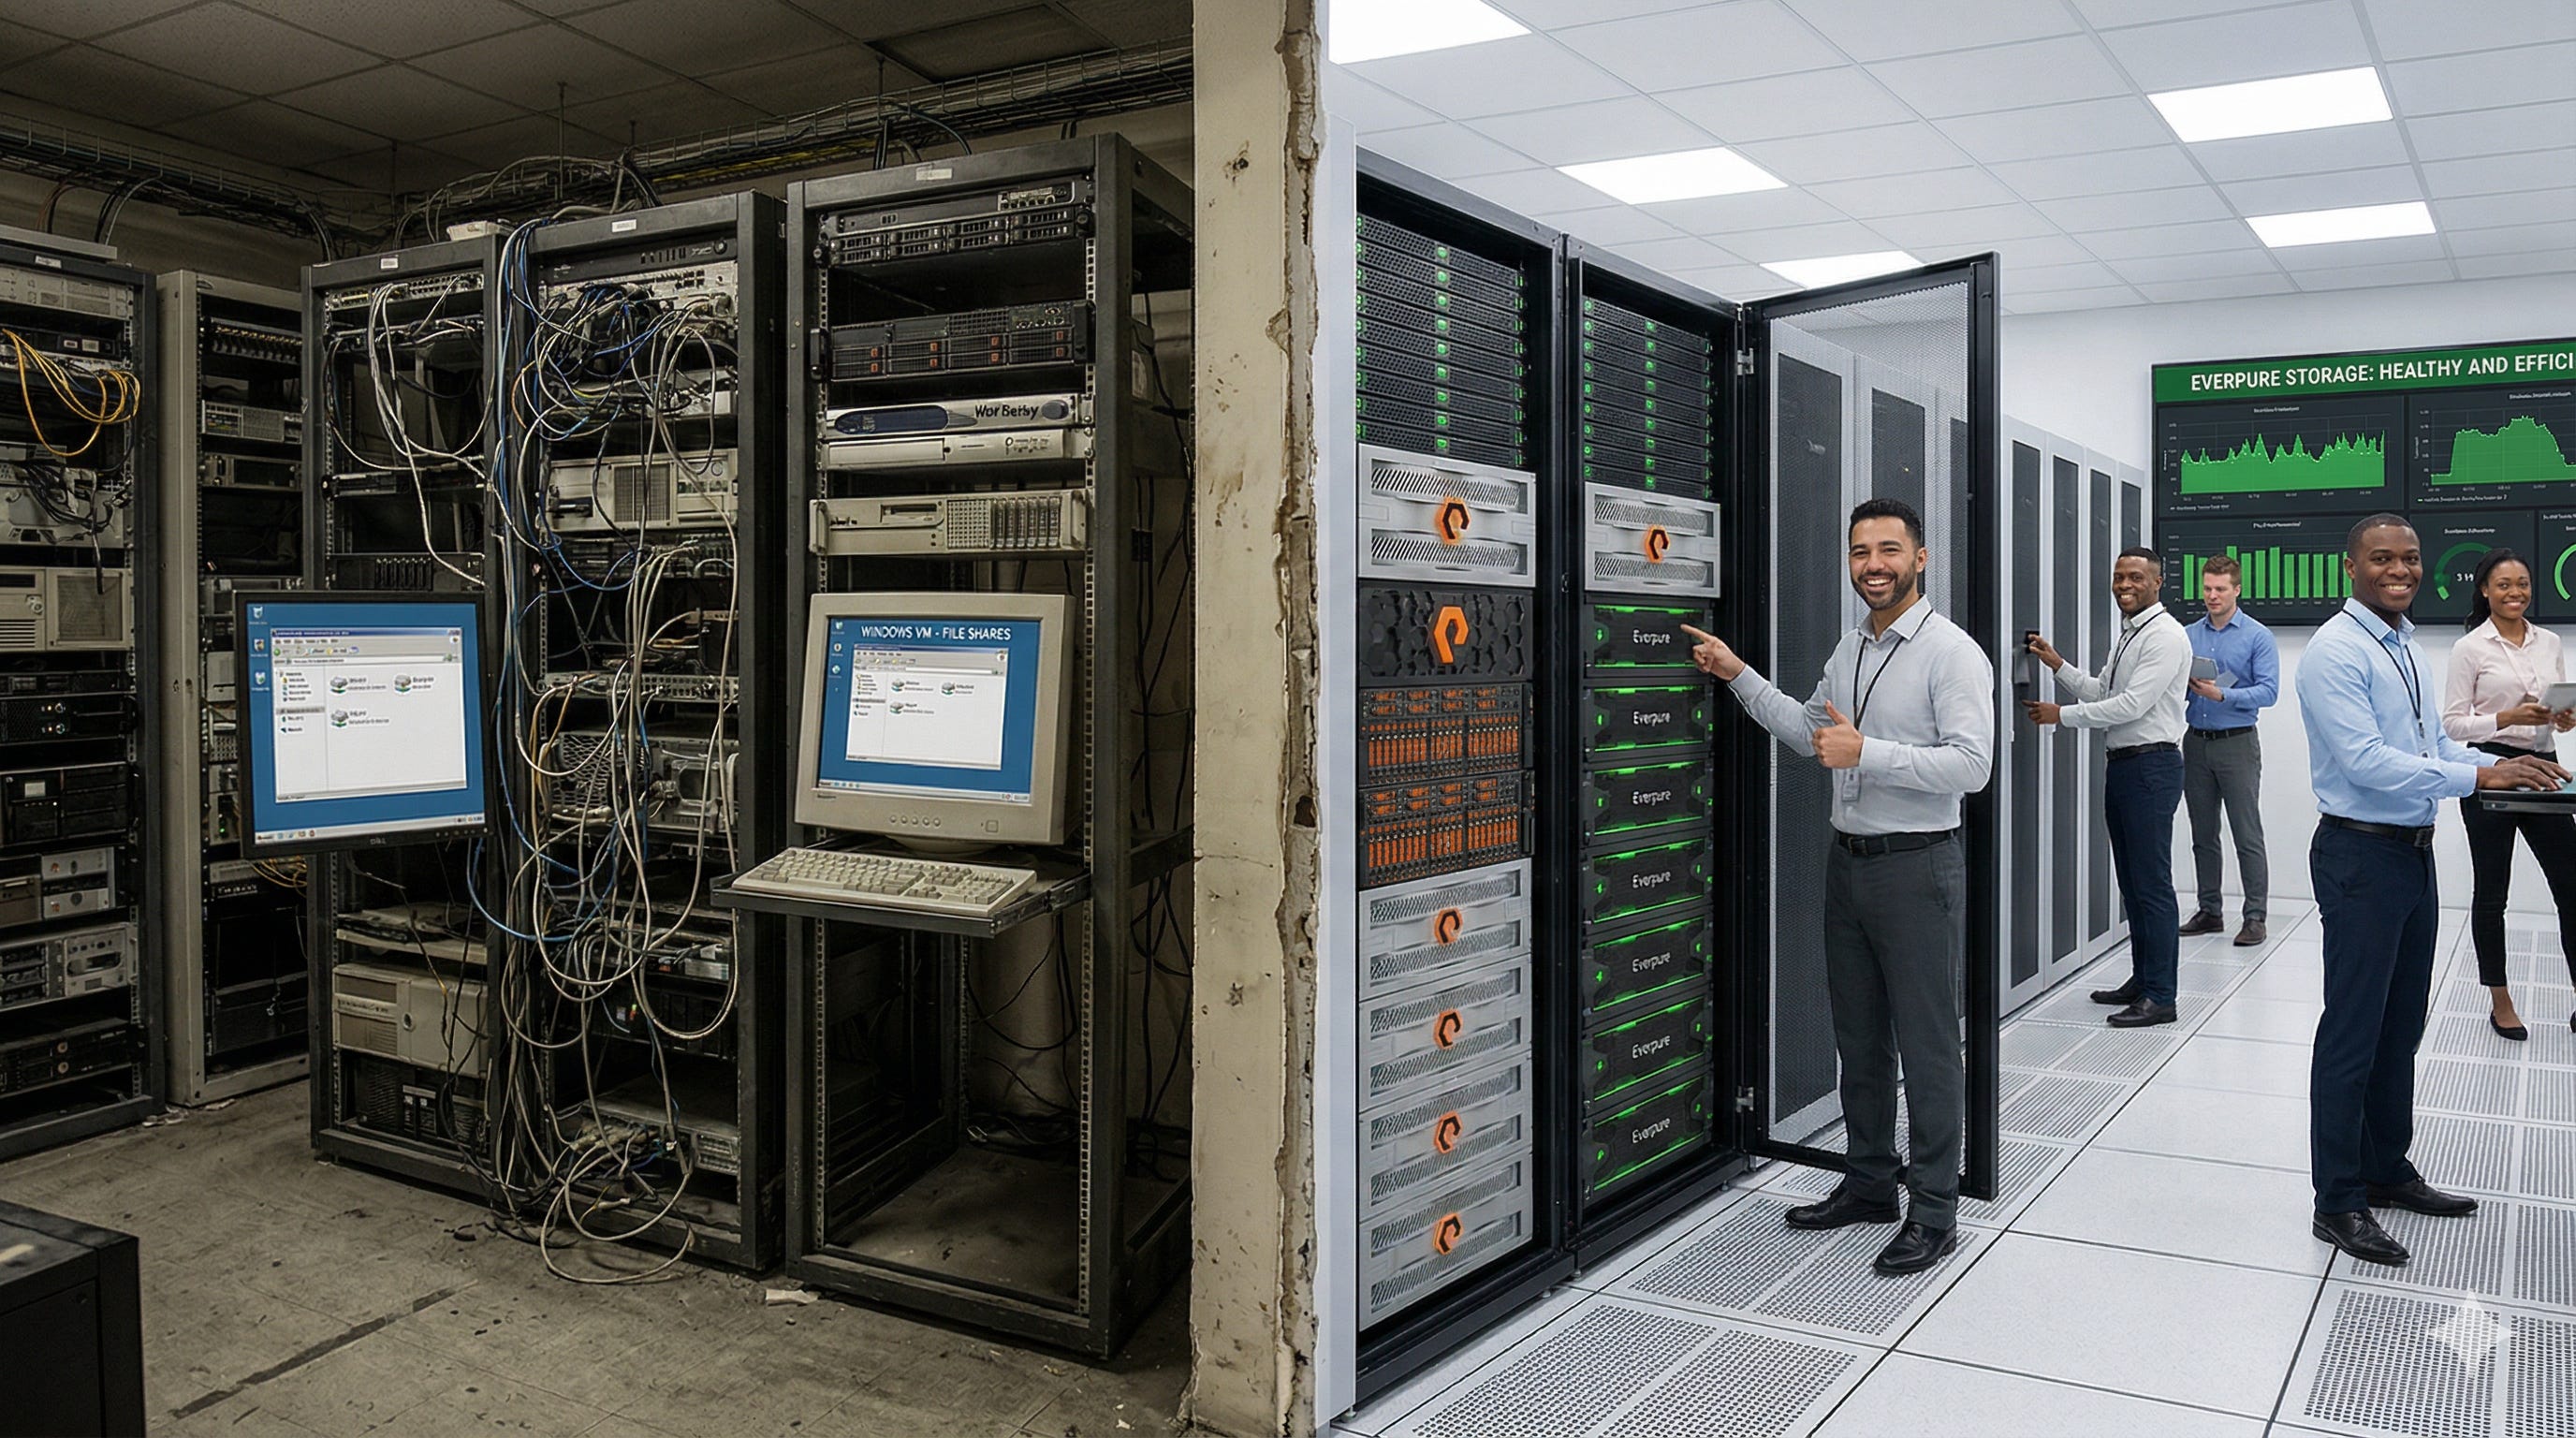
They were running a couple of Windows Server virtual machines on top of VMware vSphere, serving SMB shares to the rest of the organization. Again, nothing unusual there. This is still the default design in a lot of places, and it works well enough that nobody feels compelled to question it.
But as the meeting on, a few details started to surface. One of the VMs was consistently running hot during backup windows. Another one hadn’t been patched in a while because nobody wanted to risk disrupting access to shared data. The storage policies applied at the VM layer didn’t quite line up with what was actually configured on the array. And there was an unspoken understanding that maintaining these systems was just part of the job — something you deal with, not something you optimize.
No one had made a bad decision. The architecture made sense at the time it was implemented. My guess, based on experience, is the File Server was simply P2V’d back when VMware was a novelty. It had simply stayed in place, unchanged, while everything around it evolved.
What made it more interesting was that the same environment had an Everpure FlashArray running their critical workloads. It was handling databases, transactional systems, and anything else that required consistent performance and reliable data services. It was protected, replicated, and trusted.
File services, however, were living on top of virtual machines, with their own lifecycle (please, please… don’t say VMware snapshots), their own dependencies, and their own set of operational overhead.
That disconnect is what stuck with me.
So instead of continuing the theoretical discussion about architecture and “best practices,” I went back to my lab and decided to try something very simple. I wanted to see what would actually happen if I enabled file services directly on the array and treated it as a first-class file platform instead of assuming that role belonged to something else.
There was no redesign exercise, no migration plan, and no phased rollout. I wasn’t trying to prove a point on a whiteboard. I just wanted to turn it on and see if the experience matched what we tend to claim in conversations.
Nothing broke. Nothing felt forced. And more importantly, nothing about it felt like a compromise.
This post walks through exactly what I did to enable and run file services on a FlashArray //X20R4 running Purity 6.9.2. The goal is not to explain the architecture in abstract terms, but to show how straightforward it is to take something that already exists in your environment and use it in a way that removes unnecessary complexity.
What I realized (and why this matters)
Once everything was up and running, the first realization was that this is not a workaround or a secondary feature designed to fill a gap. FlashArray File is integrated into the platform in a way that makes it behave like a natural extension of what the system already does well. It uses the same controllers, the same global storage pool, and the same data services that are already in place for block workloads. There is no separate management layer, no additional appliance (remember Data Movers and NAS Personas?), and no need to think about it as something different from the rest of the system.
That by itself is useful, but it is not the most important part.
What stood out more was the amount of operational overhead that simply disappeared. When file services run on virtual machines, you inherit everything that comes with them. You are responsible for the guest operating system, including patching cycles, security updates, and the occasional issue that appears at the worst possible time. You are also consuming hypervisor resources and, in many cases, paying for licensing that exists solely to support a function that could be handled elsewhere. On top of that, you end up managing data protection, performance, and capacity in two different places (remember RDMs, or in-guest iSCSI?), which introduces opportunities for inconsistency.
By moving file services onto the array, that entire layer is removed. You are not just changing where the workload runs; you are simplifying how it is operated, protected, and maintained over time.
The second realization was that this approach aligns with where things are clearly heading. Everpure is already extending these capabilities with ActiveCluster for File, which will bring synchronous replication and continuous availability to unstructured data. I do not have that running in my lab yet, but it is not difficult to see the direction. As those capabilities become more widely available, the remaining reasons to maintain separate file platforms will continue to shrink.
That will be a conversation for a future post. Let’s tentatively call it Part 3 of the series.
Before you start (the part that actually matters)
Enabling file services on the array is straightforward. The part that tends to create friction is everything that surrounds the configuration, particularly networking and integration with existing services.
The first consideration is the choice of network interfaces. Although the array provides 1GbE management ports, those interfaces are not intended for serving file workloads. Using them for SMB or NFS traffic introduces an artificial bottleneck that will affect performance and, more importantly, perception. File services should be configured on the 10 or 25GbE data ports, which are designed to handle production traffic and provide the throughput expected from the platform.
Here is what my array looked like earlier today:
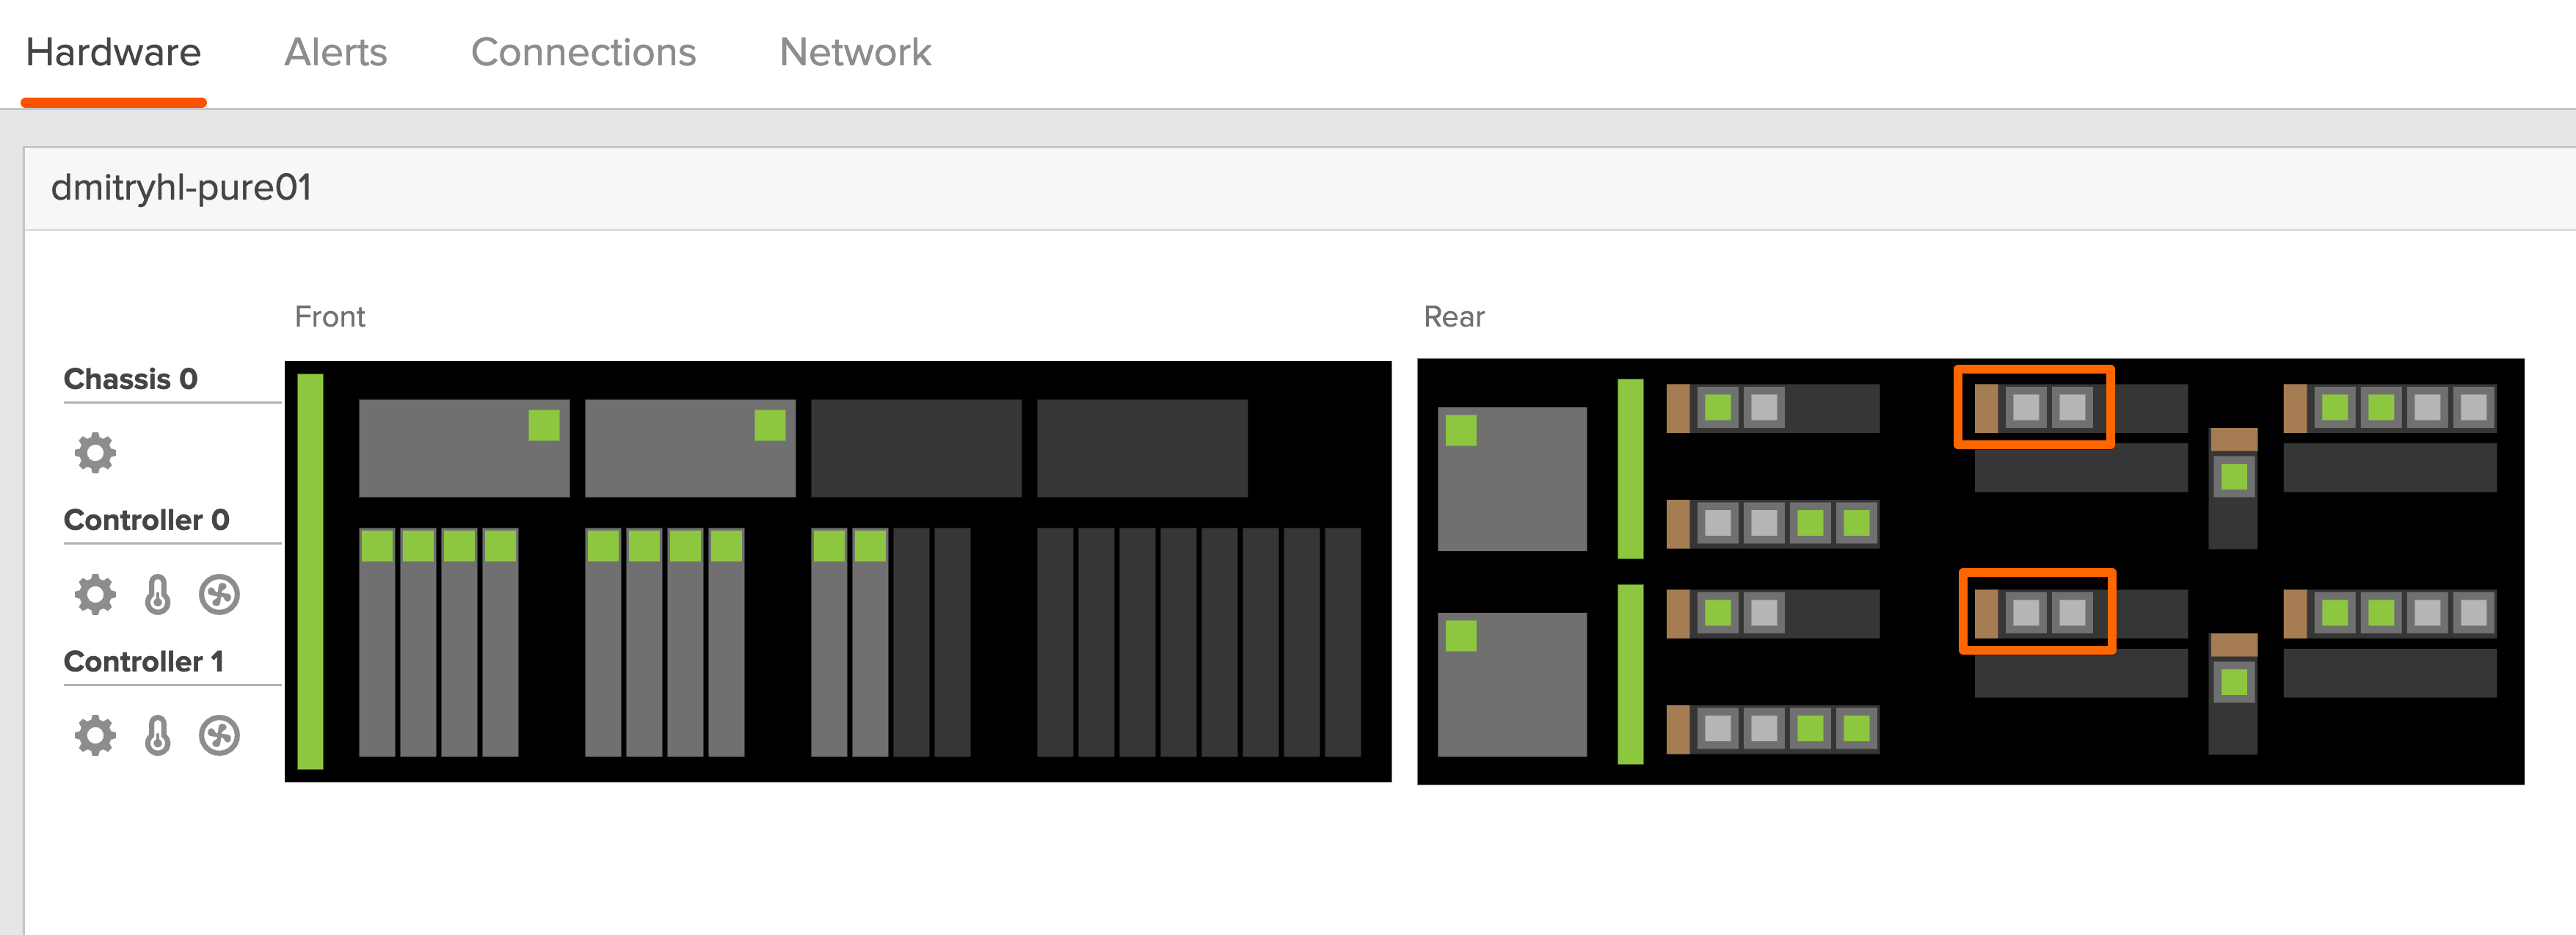
The highlighted ports are ETH10 and ETH11 on both controllers.
Redundancy should be planned, but it does not need to be over engineered. A simple and reliable starting point is to use at least two ports per controller, ensuring that the configuration remains consistent across both sides. The goal is to achieve predictable failover behavior rather than to build a complex network design that is difficult to troubleshoot.
One concept that is worth understanding early is the File Virtual Network Interface, or File VIF. This is the logical identity of the file service—the IP address that clients use to connect. It is designed to move between controllers as needed, maintaining availability during failover events. Once this concept is clear, the rest of the networking configuration becomes much easier to follow.
I just quickly ran downstairs to connect the physical cables to all 4 ports. Each controller has connectivity to 2 separate Ethernet for physical redundancy.
My lab was built within budgetary constraints - that means I don’t have separate ethernet switches and I don’t have the time to build a separate DNS Server for FA File Services.
Everpure recommends separating file client traffic from management traffic, but that’s a best practice, not a requirement.
I am not going to invent 192.168.5.0/24 just because it “feels like file.”
Since my lab switch is a single flat, untagged network and the environment is really just 192.168.1.0/24, I will just us the most practical approach - put the FA File VIFs on that same 192.168.1.0/24 network with their own IP addresses.
Here is what I did:
I just kept the file VIFs on
192.168.1.0/24since that is the only real network available.FlashArray expects unique layer-3 subnets and does not support overlapping networks.
DNS
In my specific configuration, I don’t need a new DNS server.
My existing management DNS servers can resolve the AD/DC hostnames and the FA File names/computer object.
FA File can use the same DNS as management with no extra file-DNS configuration.
By default, DNS lookups will go out the management interfaces, so my DNS server just needs to be reachable from the management network. And it is.
Let’s turn the lights on, shall we?
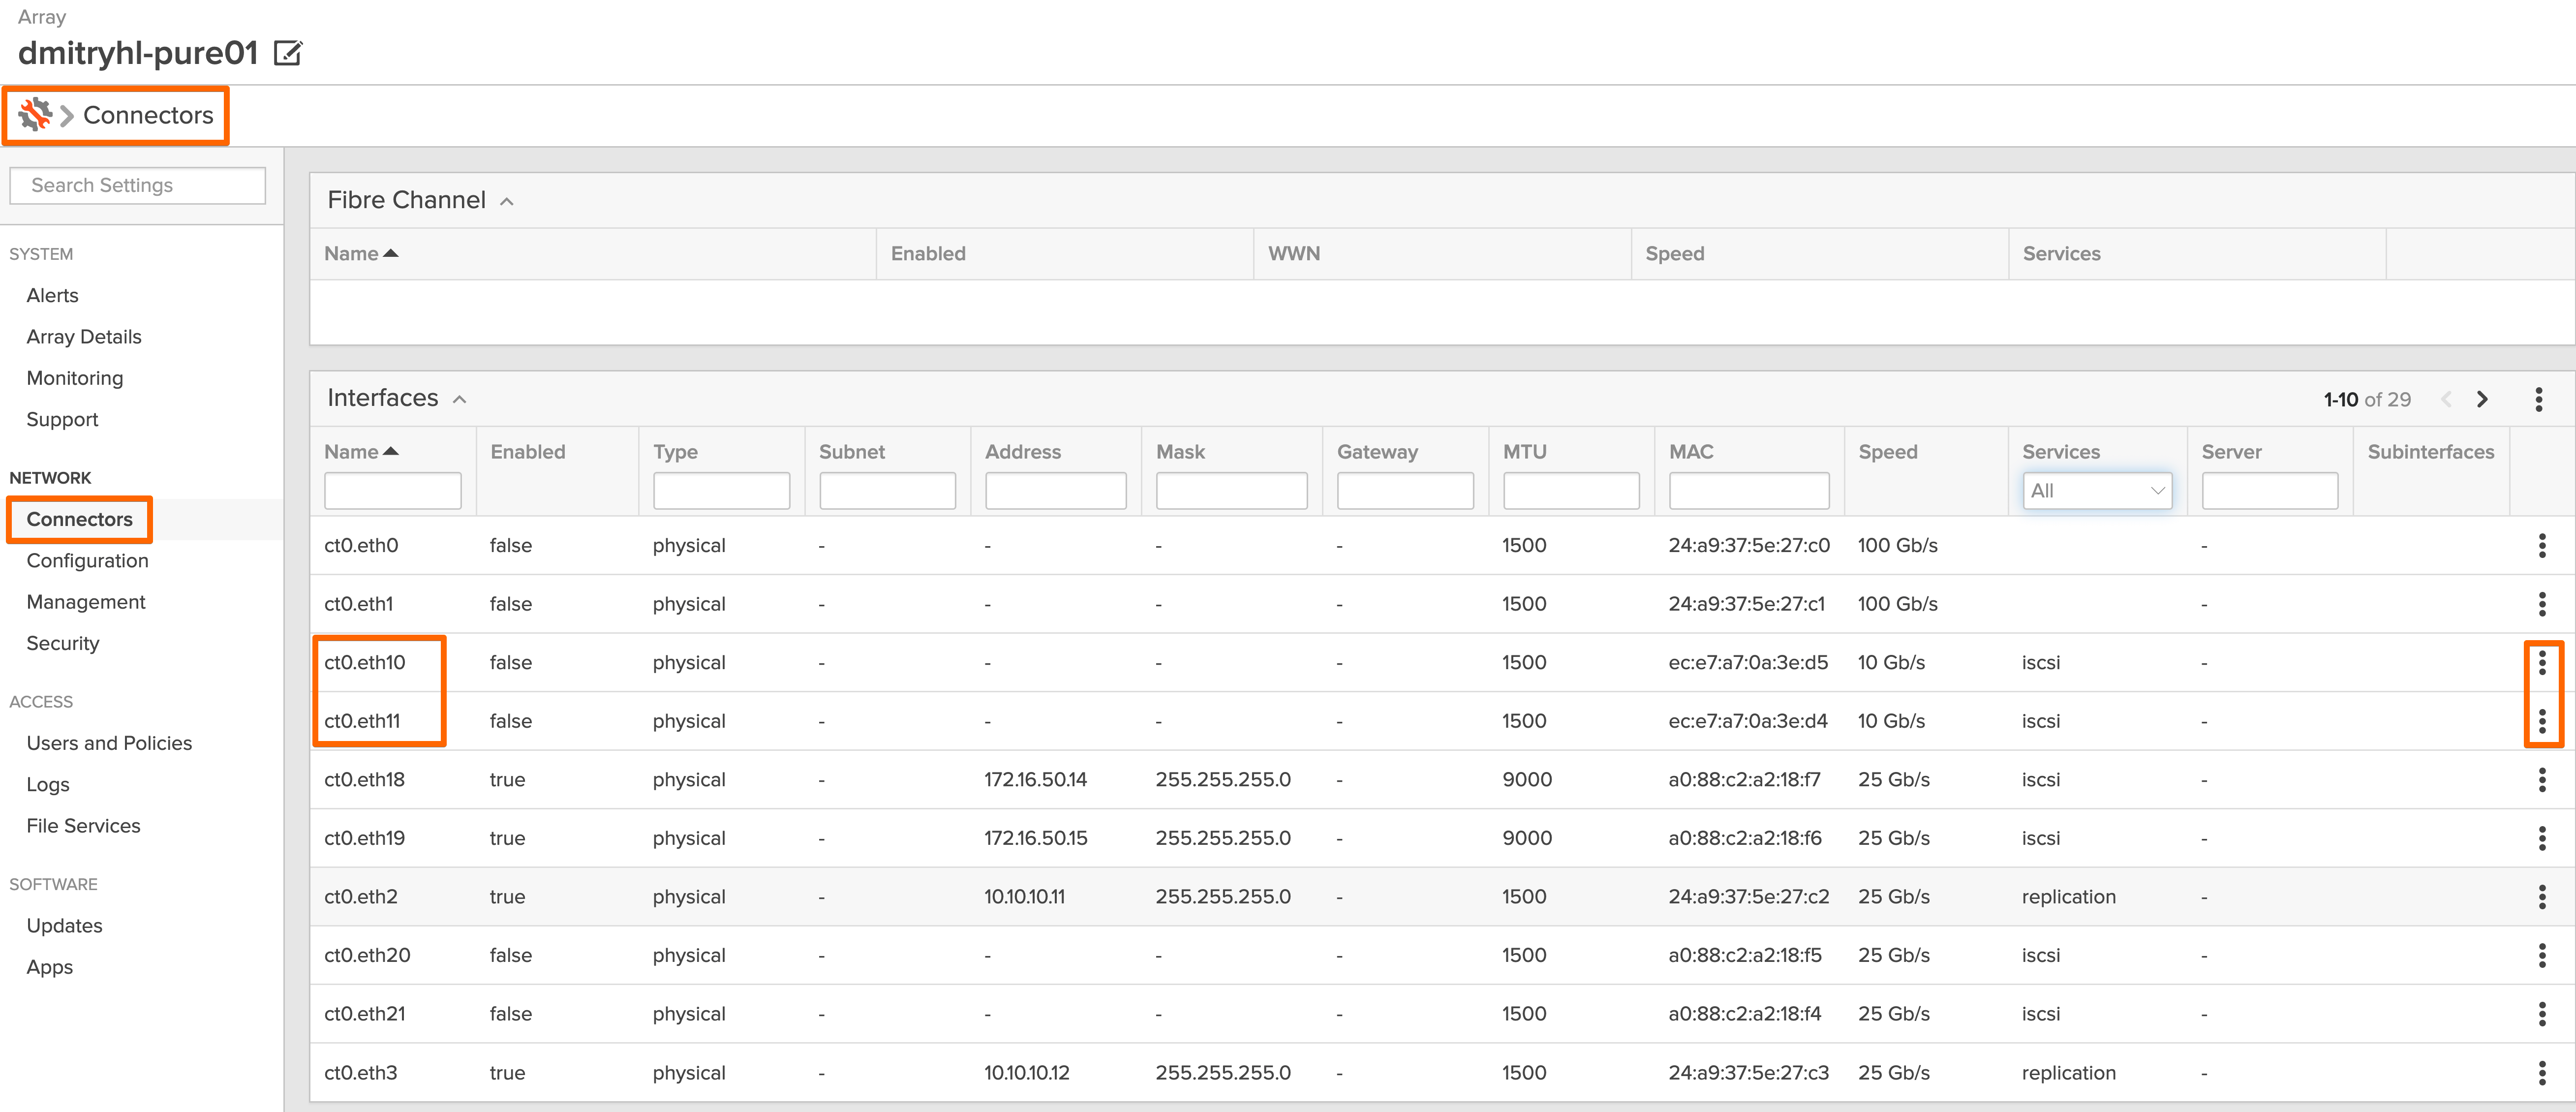
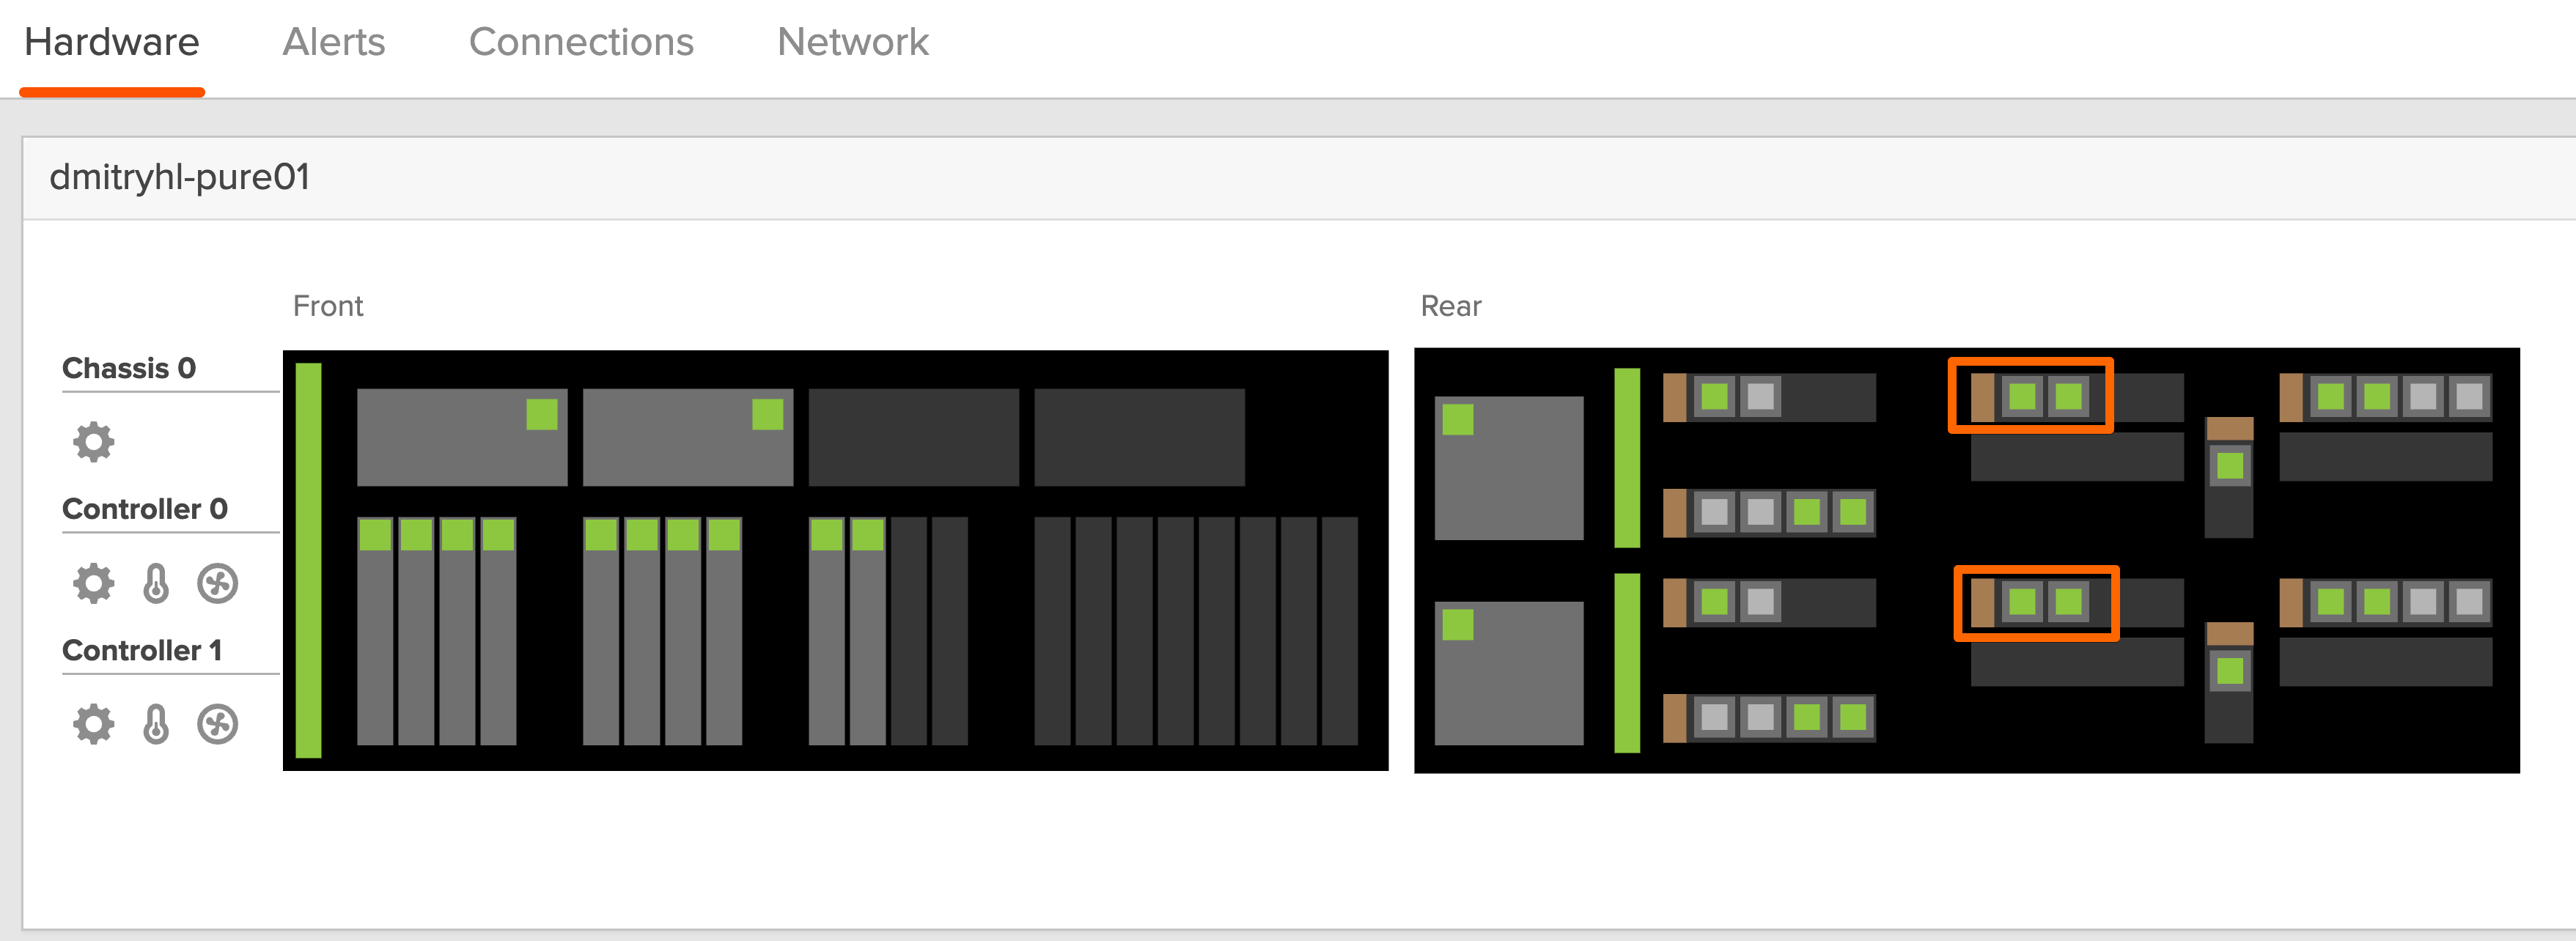
After assigning the IP addresses and enabling the ports, the lights came on.
Important design note
I will use one client-facing VIF IP for the file service, for example:
File VIF IP:
192.168.1.135Netmask:
255.255.255.0Gateway: my
192.168.1.2default gateway
Do not try to use
192.168.1.131-134as four separate FA File IPs unless you intentionally want multiple VIFs. Thect*.eth*ports are transport underlay, not the SMB/NFS endpoint IPs.
Configuring a File Server and File VIF
Open the File Services server page
Go to Storage → Servers.
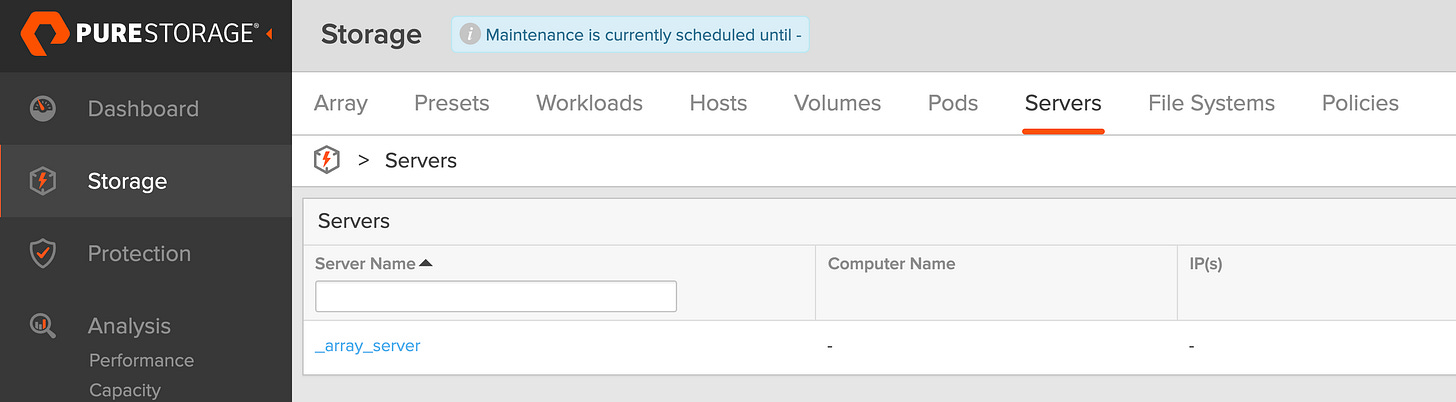
Open the default server (
_array_server) or create a new file server if you want a dedicated namespace.Stay on that server’s details page.
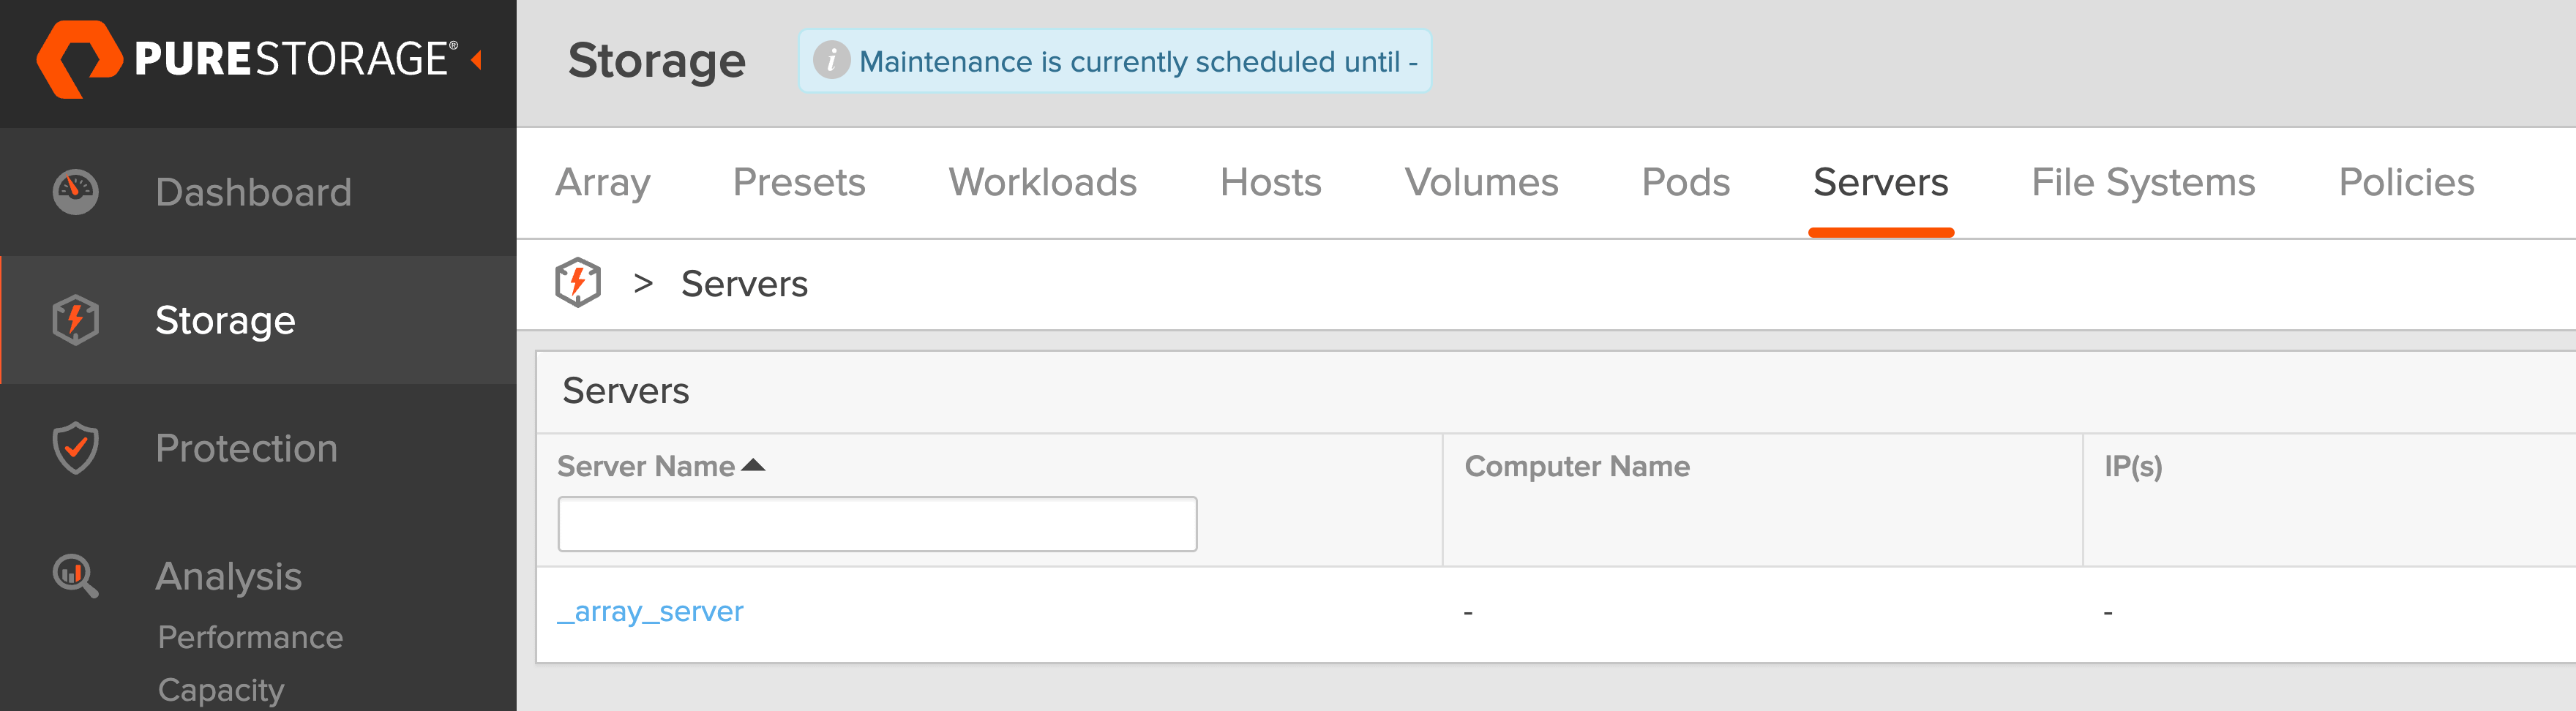
3. Create the File VIF
Use physical bonding first; it’s the simplest.
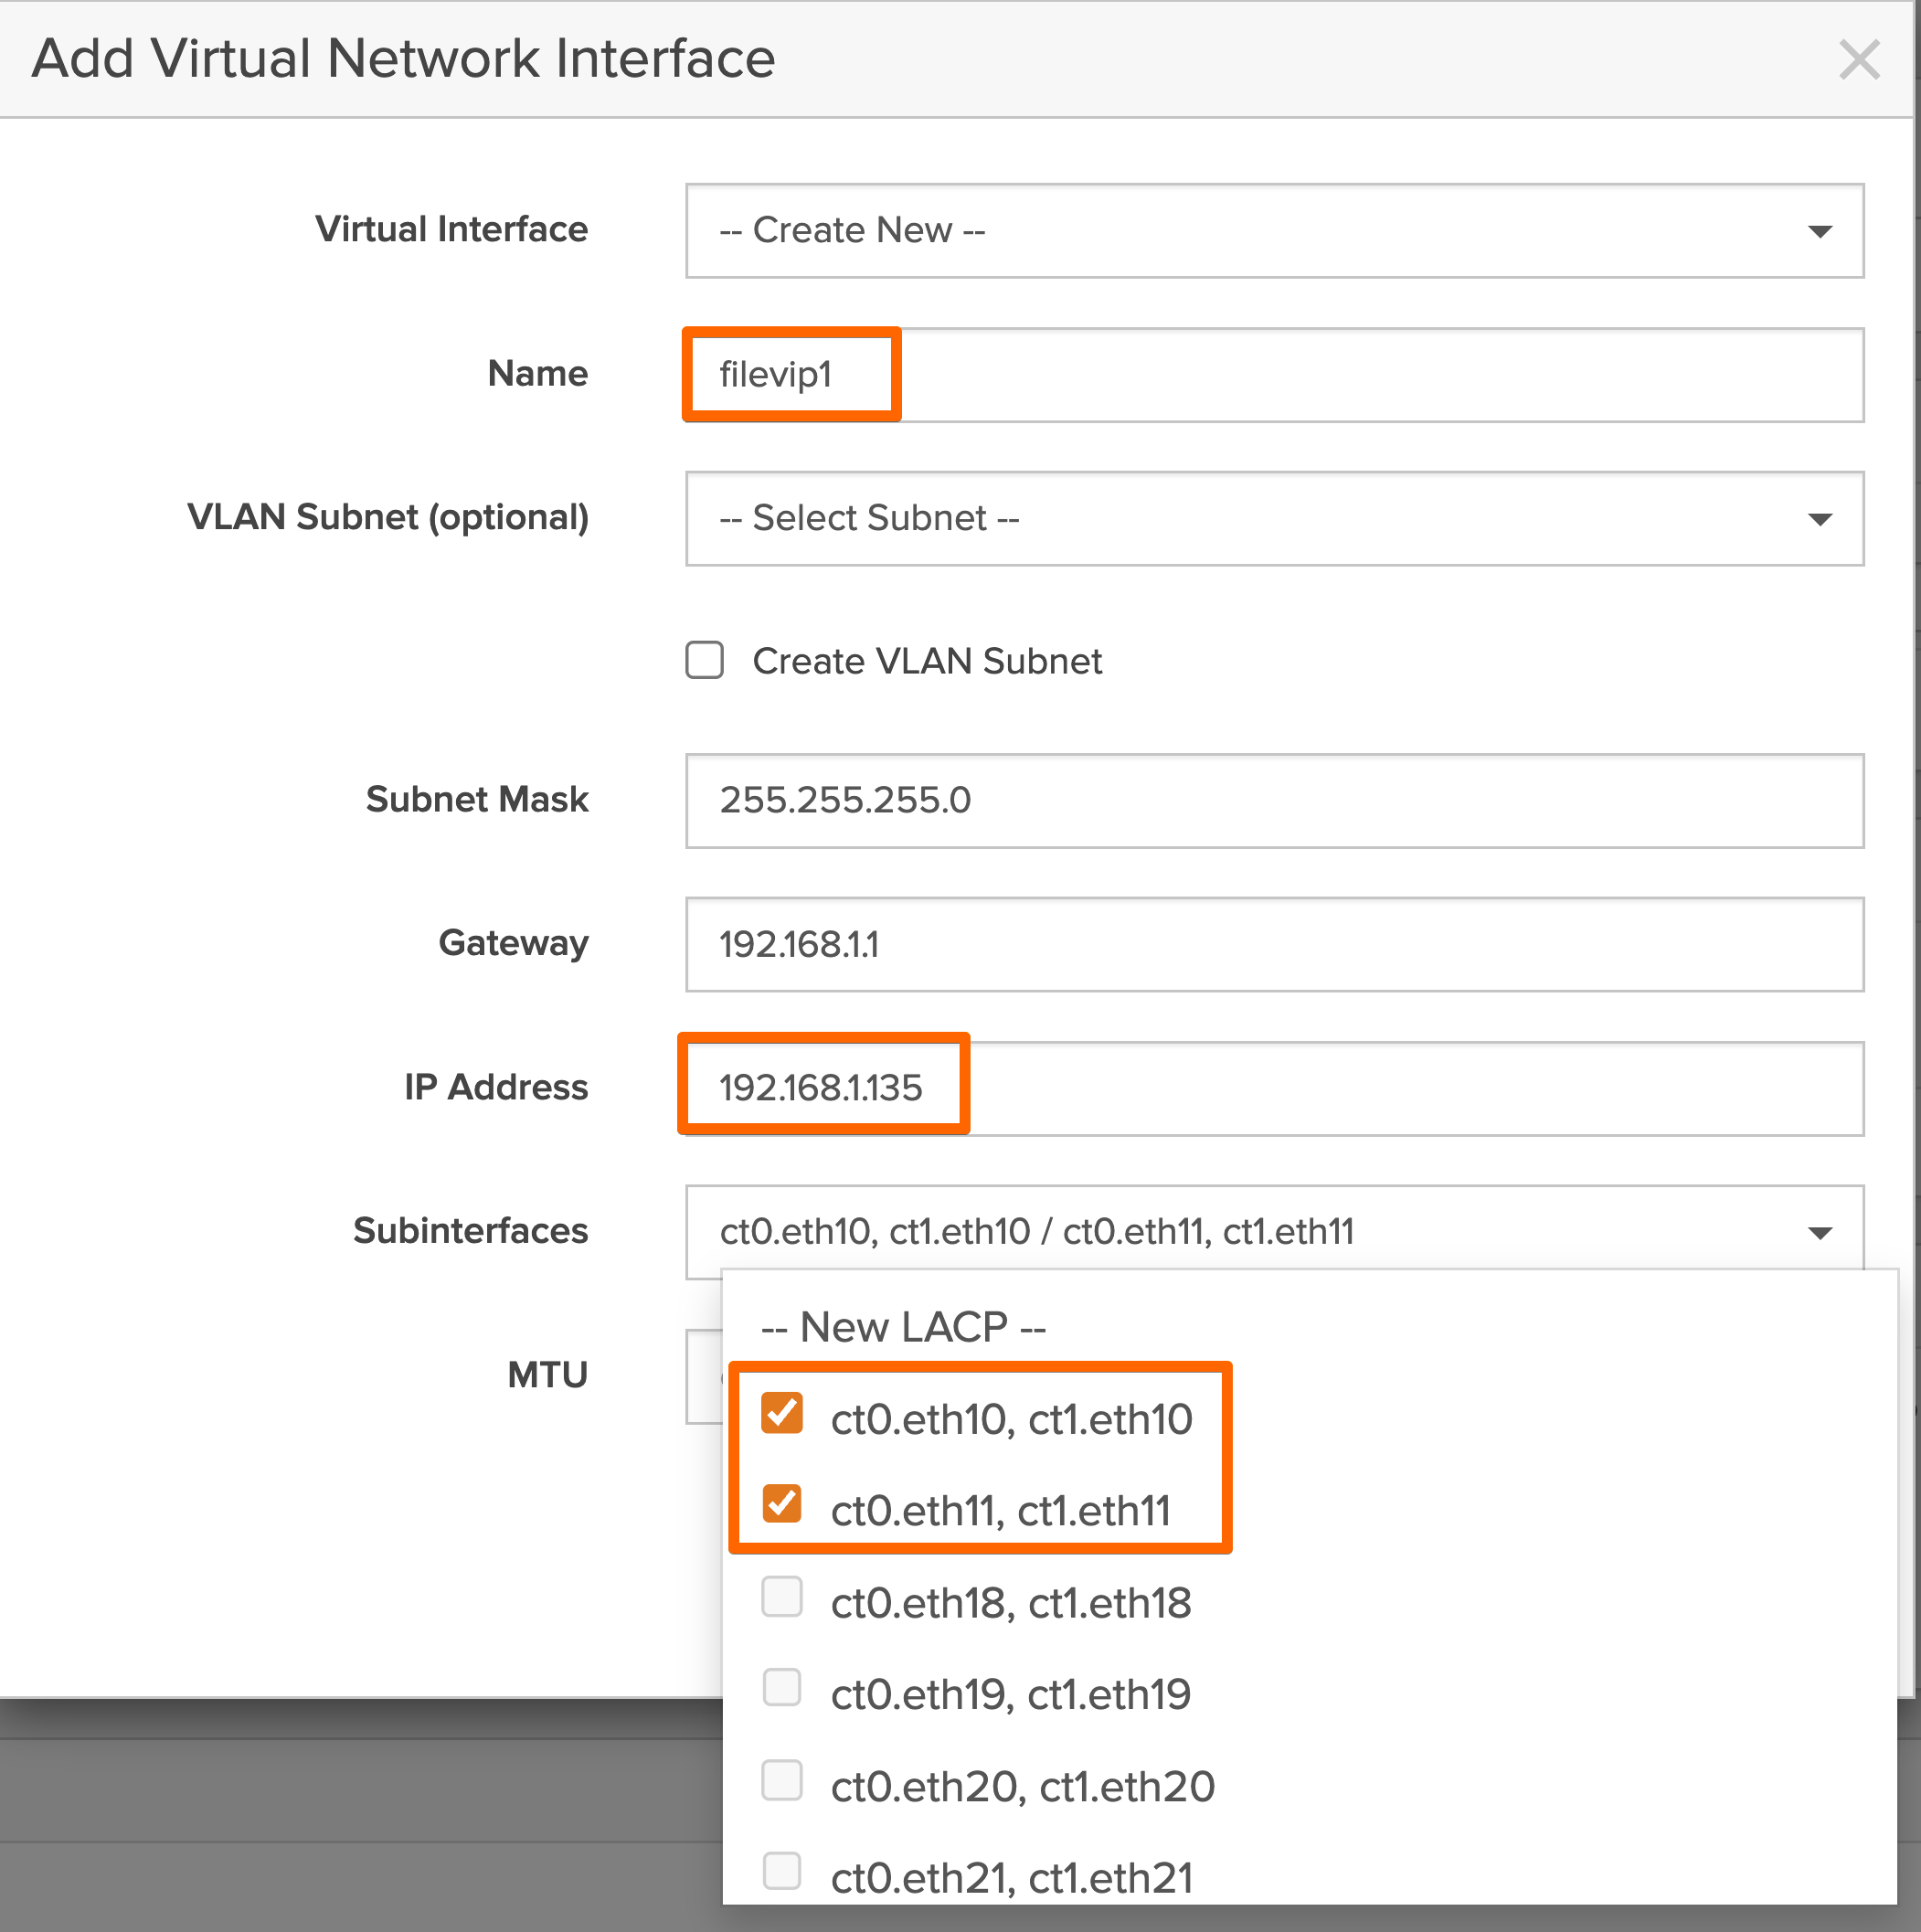
In the Virtual Interfaces section, click + Create VIF.
Choose Physical Bonding.
Select the underlying port pairs:
Pair 1:
ct0.eth10andct1.eth10Pair 2:
ct0.eth11andct1.eth11
Name the VIF something simple, e.g.:
filevip1
Enter network settings:
IP Address:
192.168.1.135Netmask:
255.255.255.0Gateway:
192.168.1.1
Leave VLAN blank since there are no VLANs.
Save and Enable the VIF.
That creates the client-facing IP for SMB/NFS.

4. Configure DNS
Integration with DNS and Active Directory is another area where a bit of preparation goes a long way. File services rely on proper name resolution and domain integration, and it is important to recognize that file-related DNS settings are separate from the array’s management DNS configuration. The system effectively becomes a participant in the domain as a file server, which means that DNS records, domain join operations, and permissions should be planned accordingly rather than improvised during setup.
Since my DNS is 192.168.1.2 and I want to reuse management DNS:
Go to the server’s DNS Settings.
My management DNS is already configured and points to
192.168.1.2If you want to explicitly add file DNS:
Click + in DNS
Name:
file-dnsDomain suffix: your AD/domain suffix
DNS server:
192.168.1.2Service:
fileSource interface can remain default unless you specifically need file VIF sourcing.
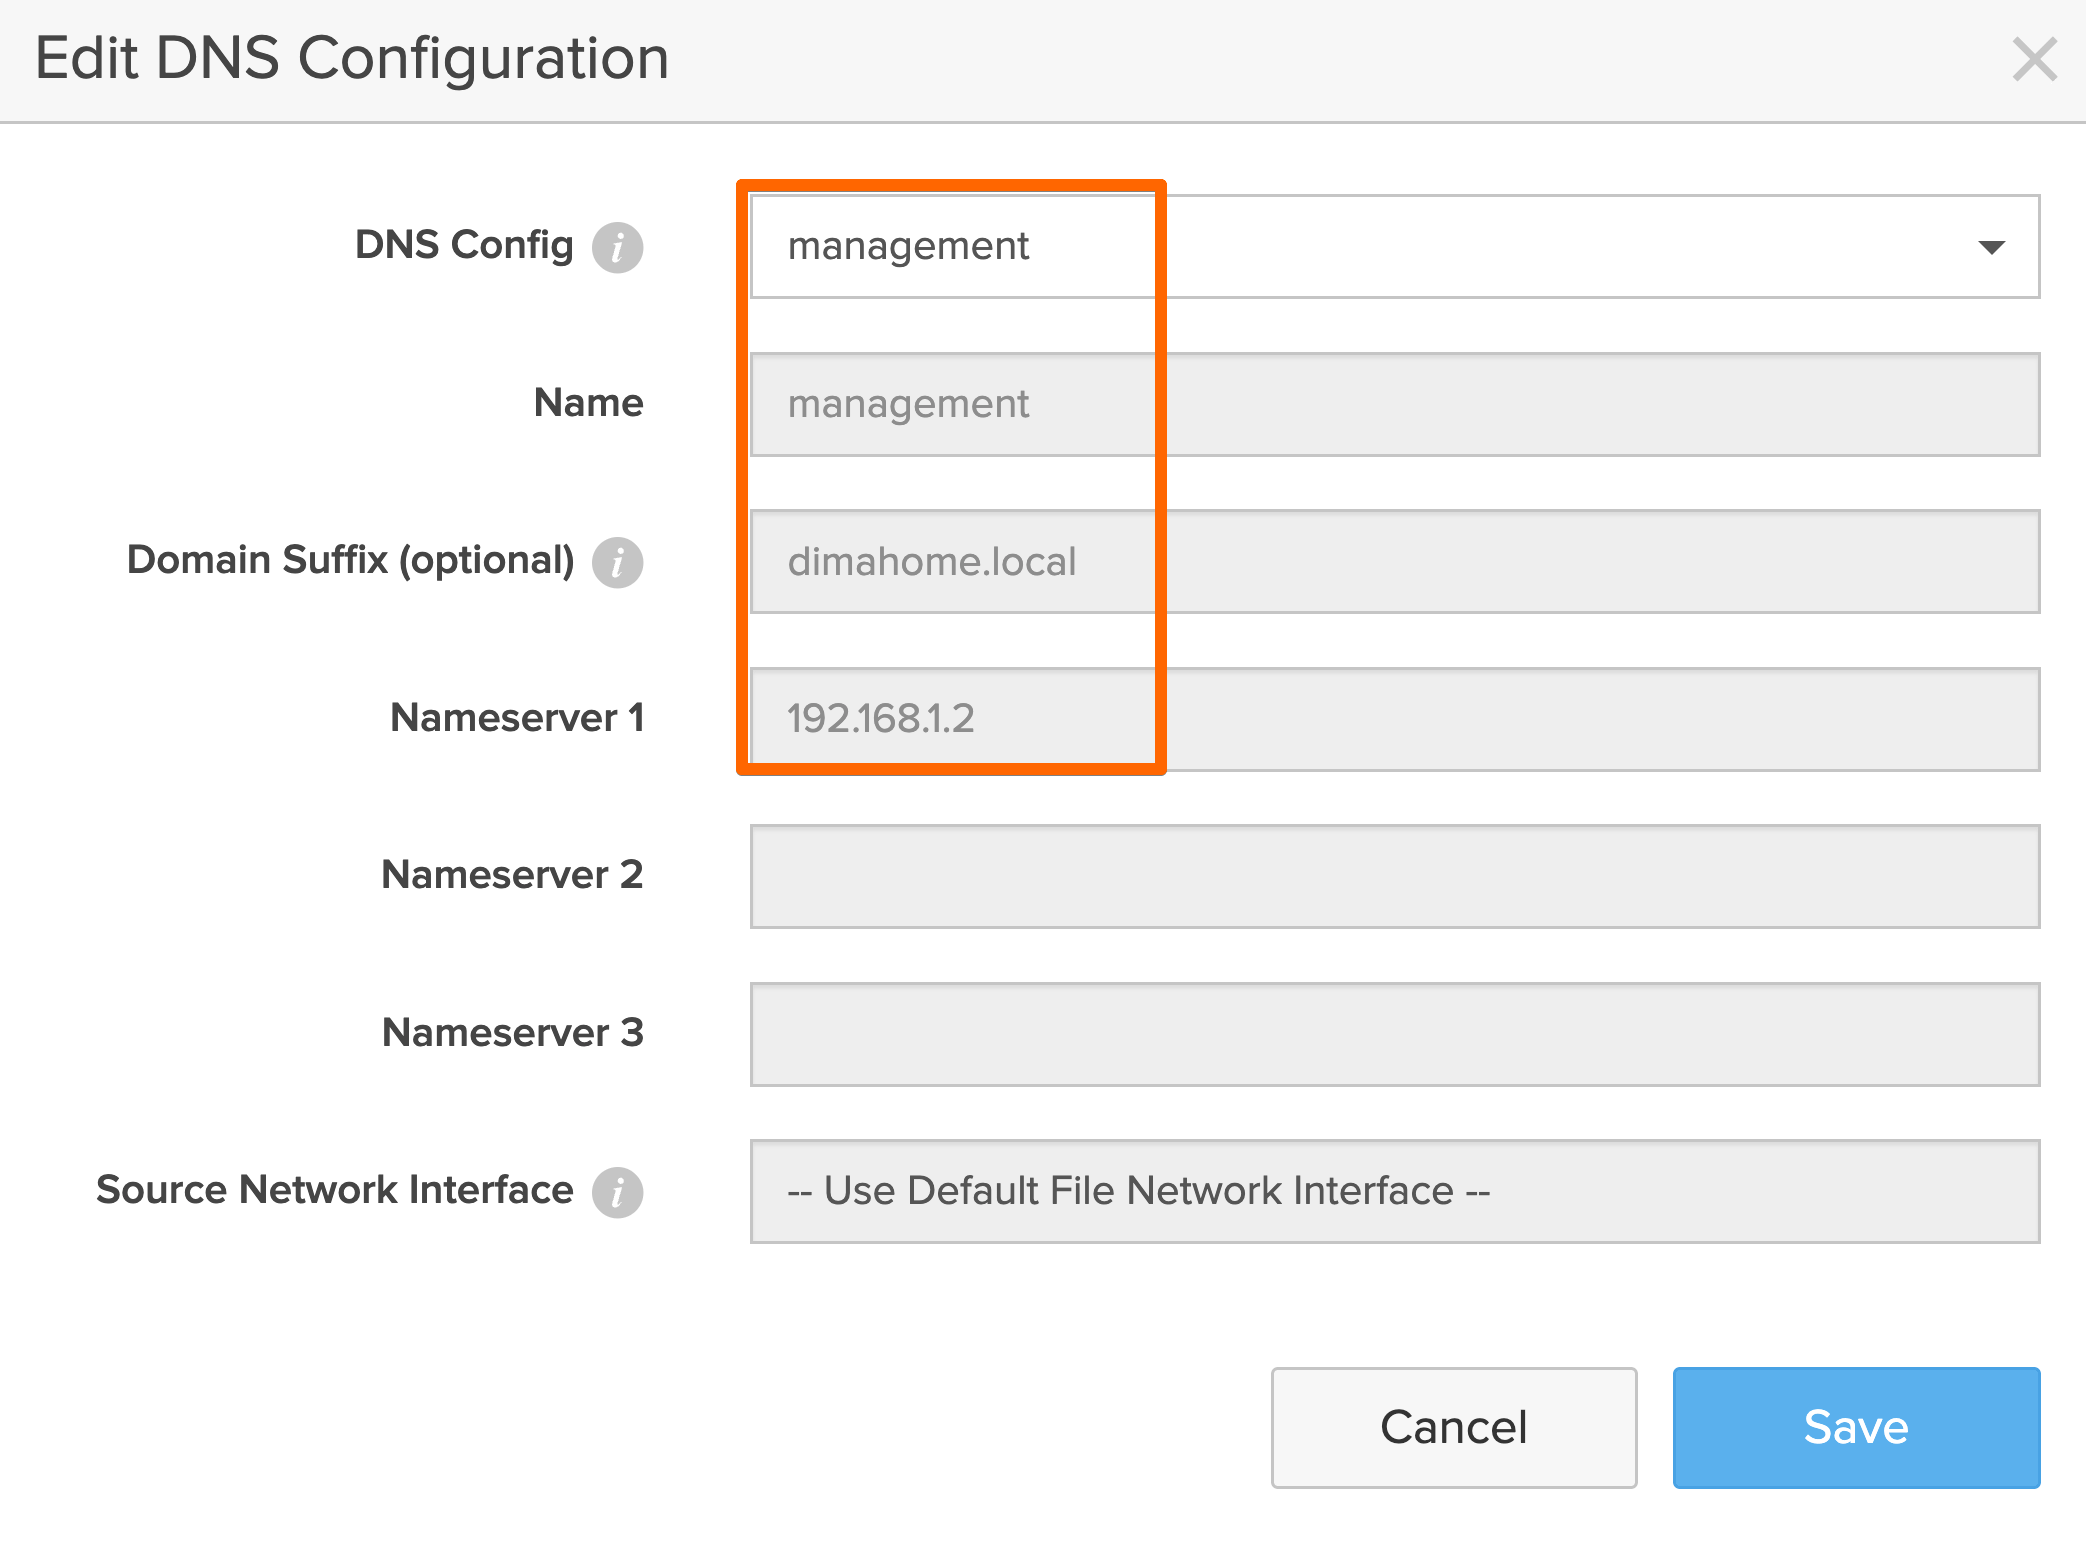
And just like that I hit a big OOPS!!!
I have ActiveCluster enabled for my block workloads. And on the version of Purity I am currently running, it cannot be used with FA File.

Well, thank goodness, it’s just a lab. I can do whatever I want.
Please DON’T do this in production. You have been warned in writing.
First, I had to disconnect the host group on the second array and delete the replication pods that were a part of the ActiveCluster. Later on, I will configure ActiveDR to ensure data protection. Or maybe just upgrade to Purity 6.10.X that has ActiveCluster for File support.
Second, I deleted the connected array and was able to finish the DNS configuration.

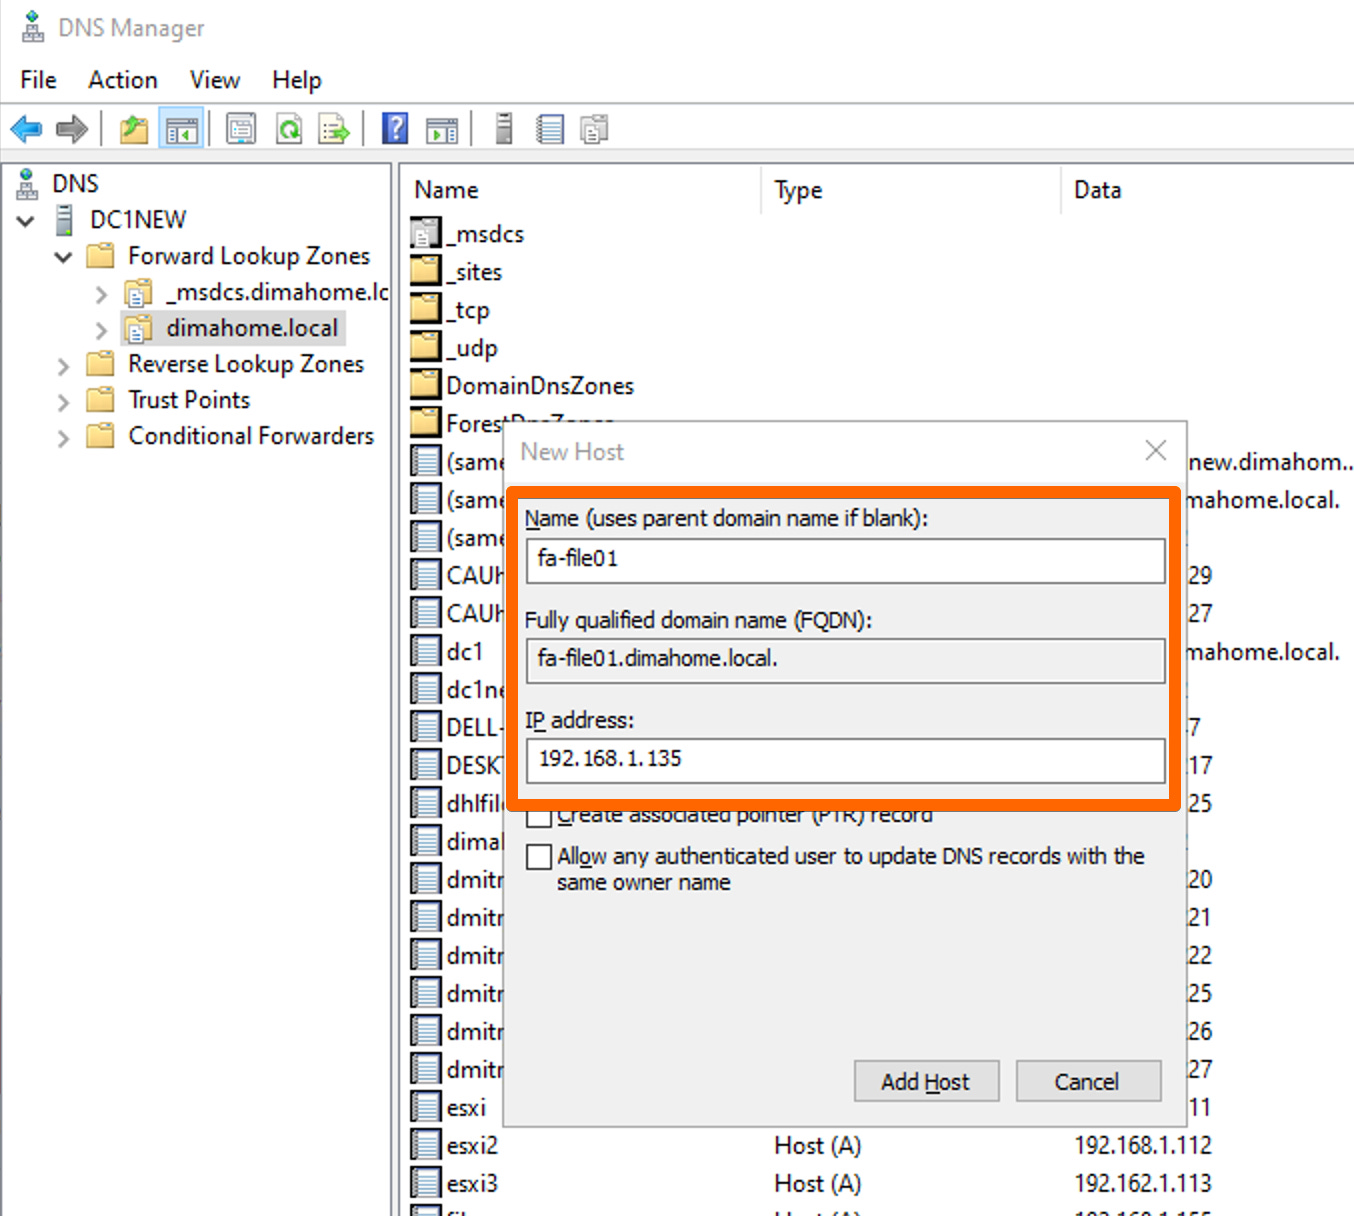
5. Create required DNS A records
On my DNS server 192.168.1.2, I created an A record for the file service name pointing to the File VIF IP.
Name:
fa-file01IP:
192.168.1.135
If you are joining AD for SMB/Kerberos:
Make sure DNS also has A records for all relevant domain controllers.
Create the A record that matches the AD computer object / FA File service name.
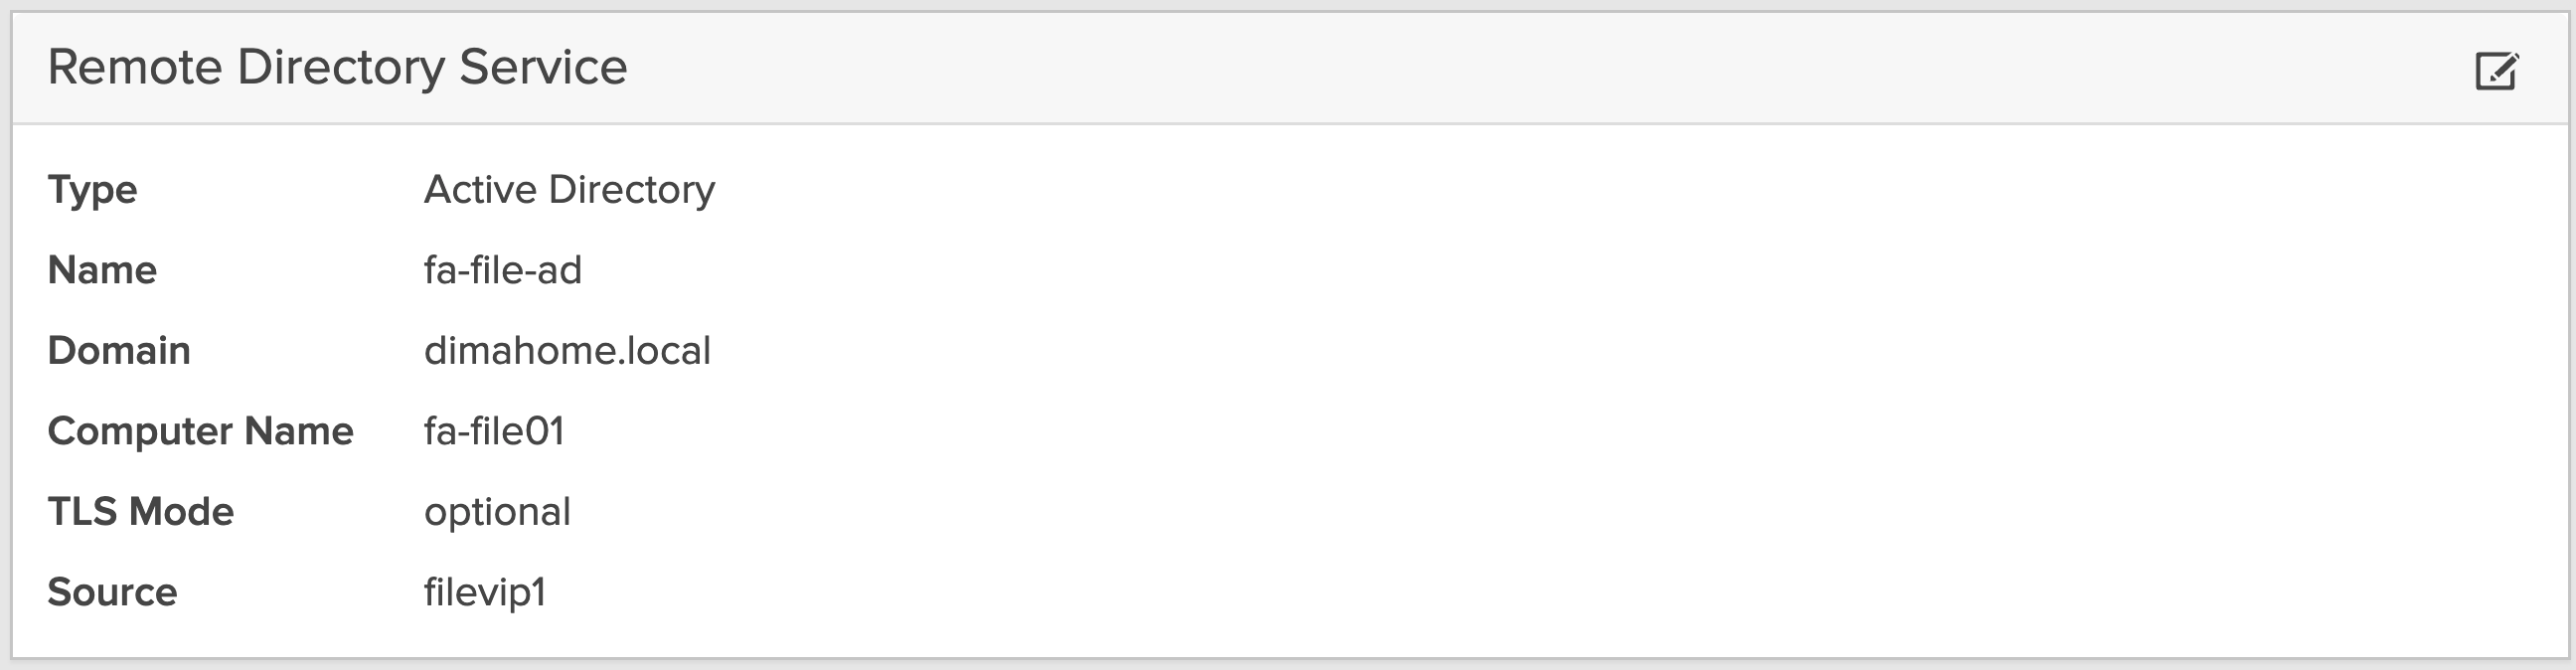
6. Join Active Directory or configure LDAP
If using SMB
Use Active Directory.
Go to:
Storage → Servers → _array_server
Then look for one of these panels:
Remote Directory Service

Click Edit Configuration
Select Active Directory
Enter:
Name
Domain DNS Name
Computer Name
Use Existing Account if applicable
AD User
Password
TLS Mode
Save / Join
This part took me 2 hours. I was getting some crazy error messaged that I’m simply embarrassed to share here.
It was not the DNS. It was an NTP server misconfiguration that was causing Kerberos to not authenticate properly. There was a 10 minute time skew between the FlashArray and the domain controller.
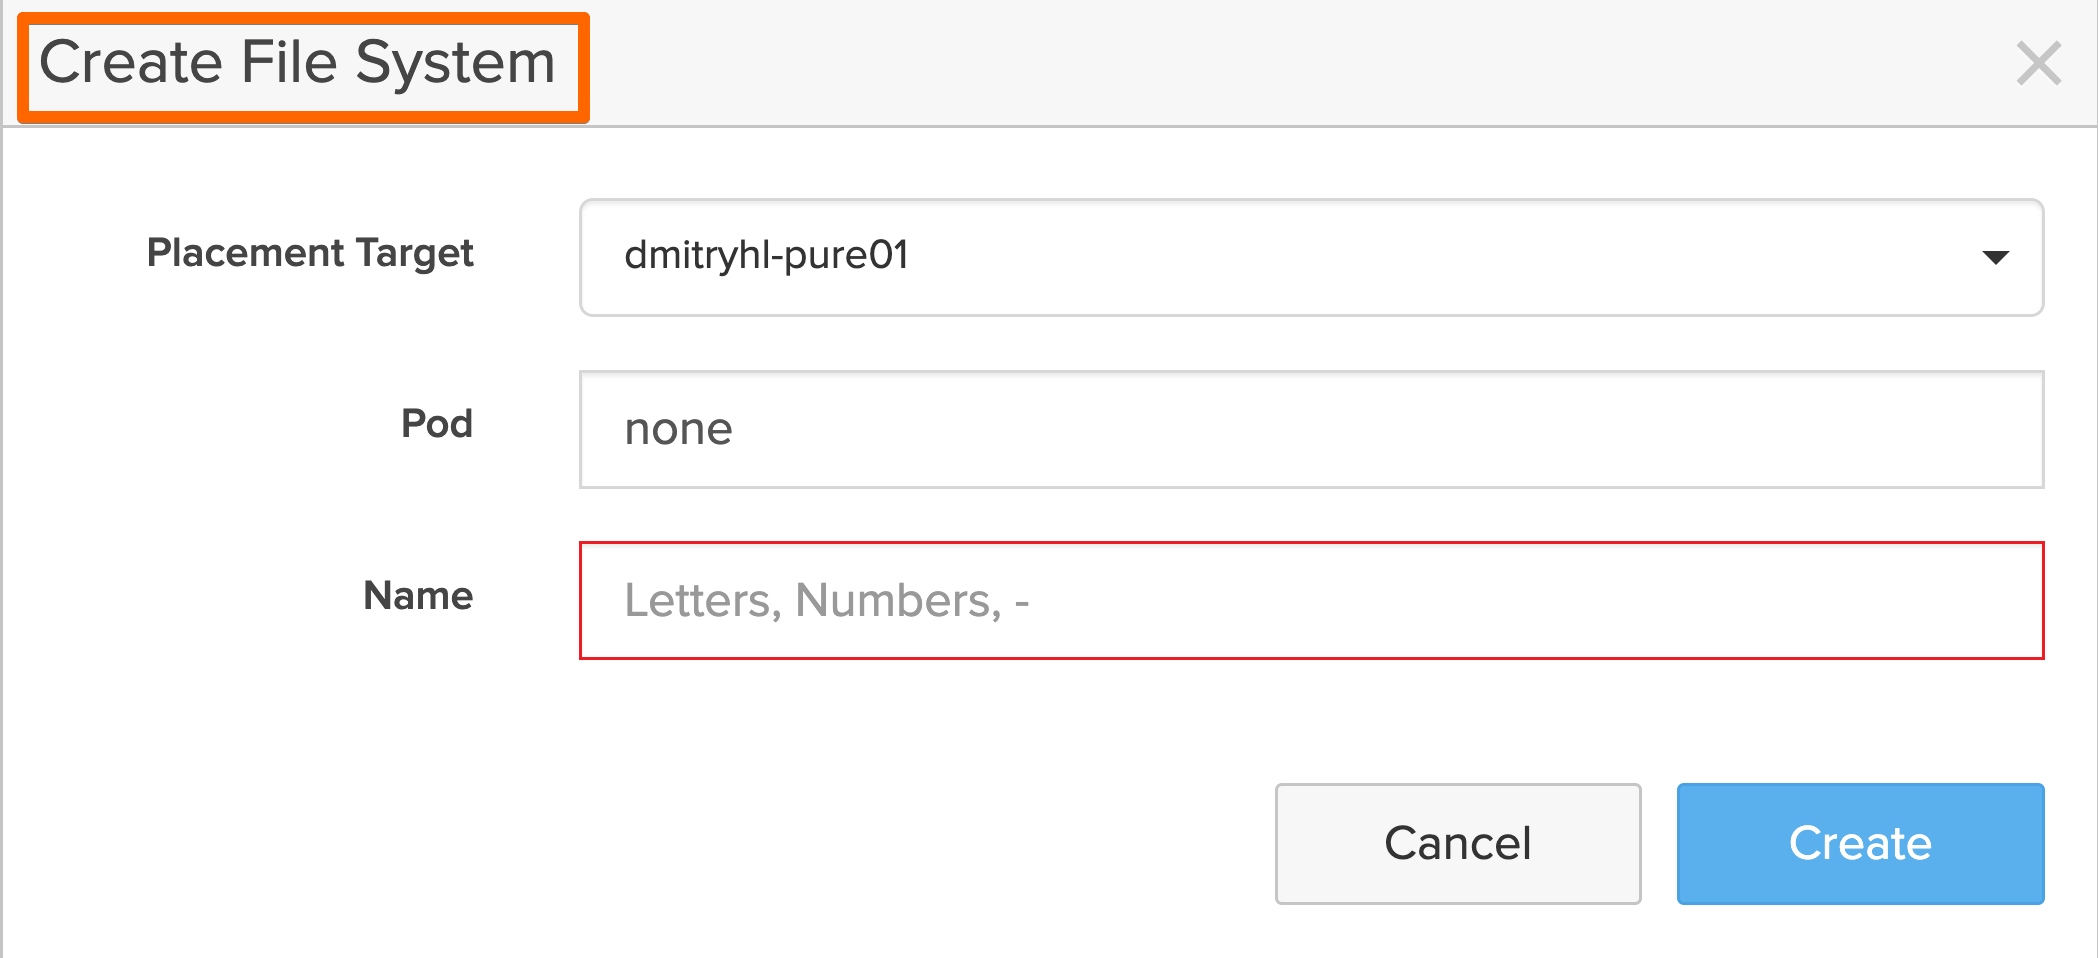
7. Create a File System
The file system is the top-level container for your unstructured data.
GUI Method: Navigate to Storage > File Systems and click the plus sign (+). Enter a name and click Create.
CLI Method: Use the following command:
purefs create <file-system-name>.
8. Create a Managed Directory
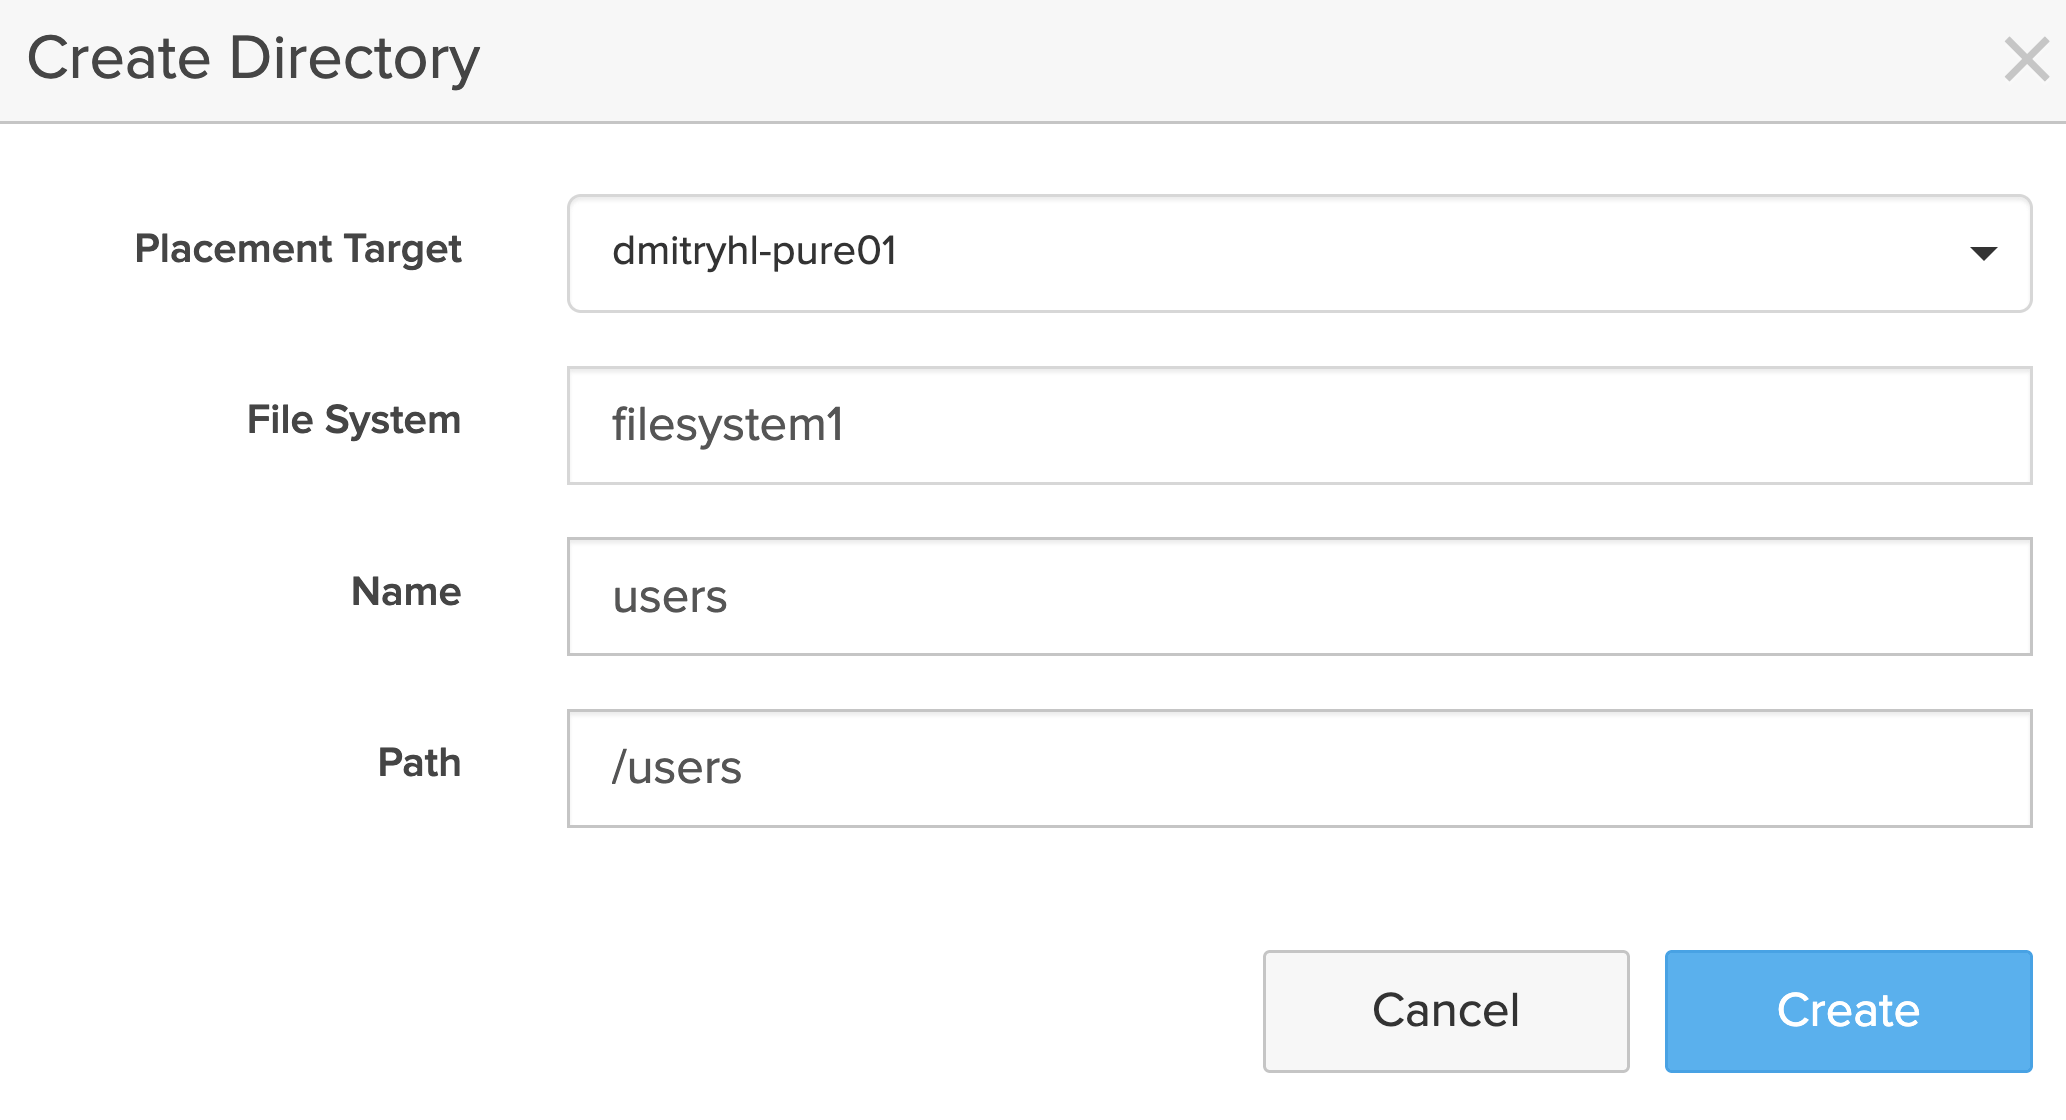
Managed directories allow you to apply specific policies (like quotas or snapshots) to subfolders within a file system.
GUI Method:
Go to Storage > File Systems.
Click on the name of the file system you just created.
Select the Directories tab and click the plus sign (+).
Enter the directory name and the internal path (e.g.,
/users).
CLI Method: Use the following command: puredir create filesystem1:users --path /users.
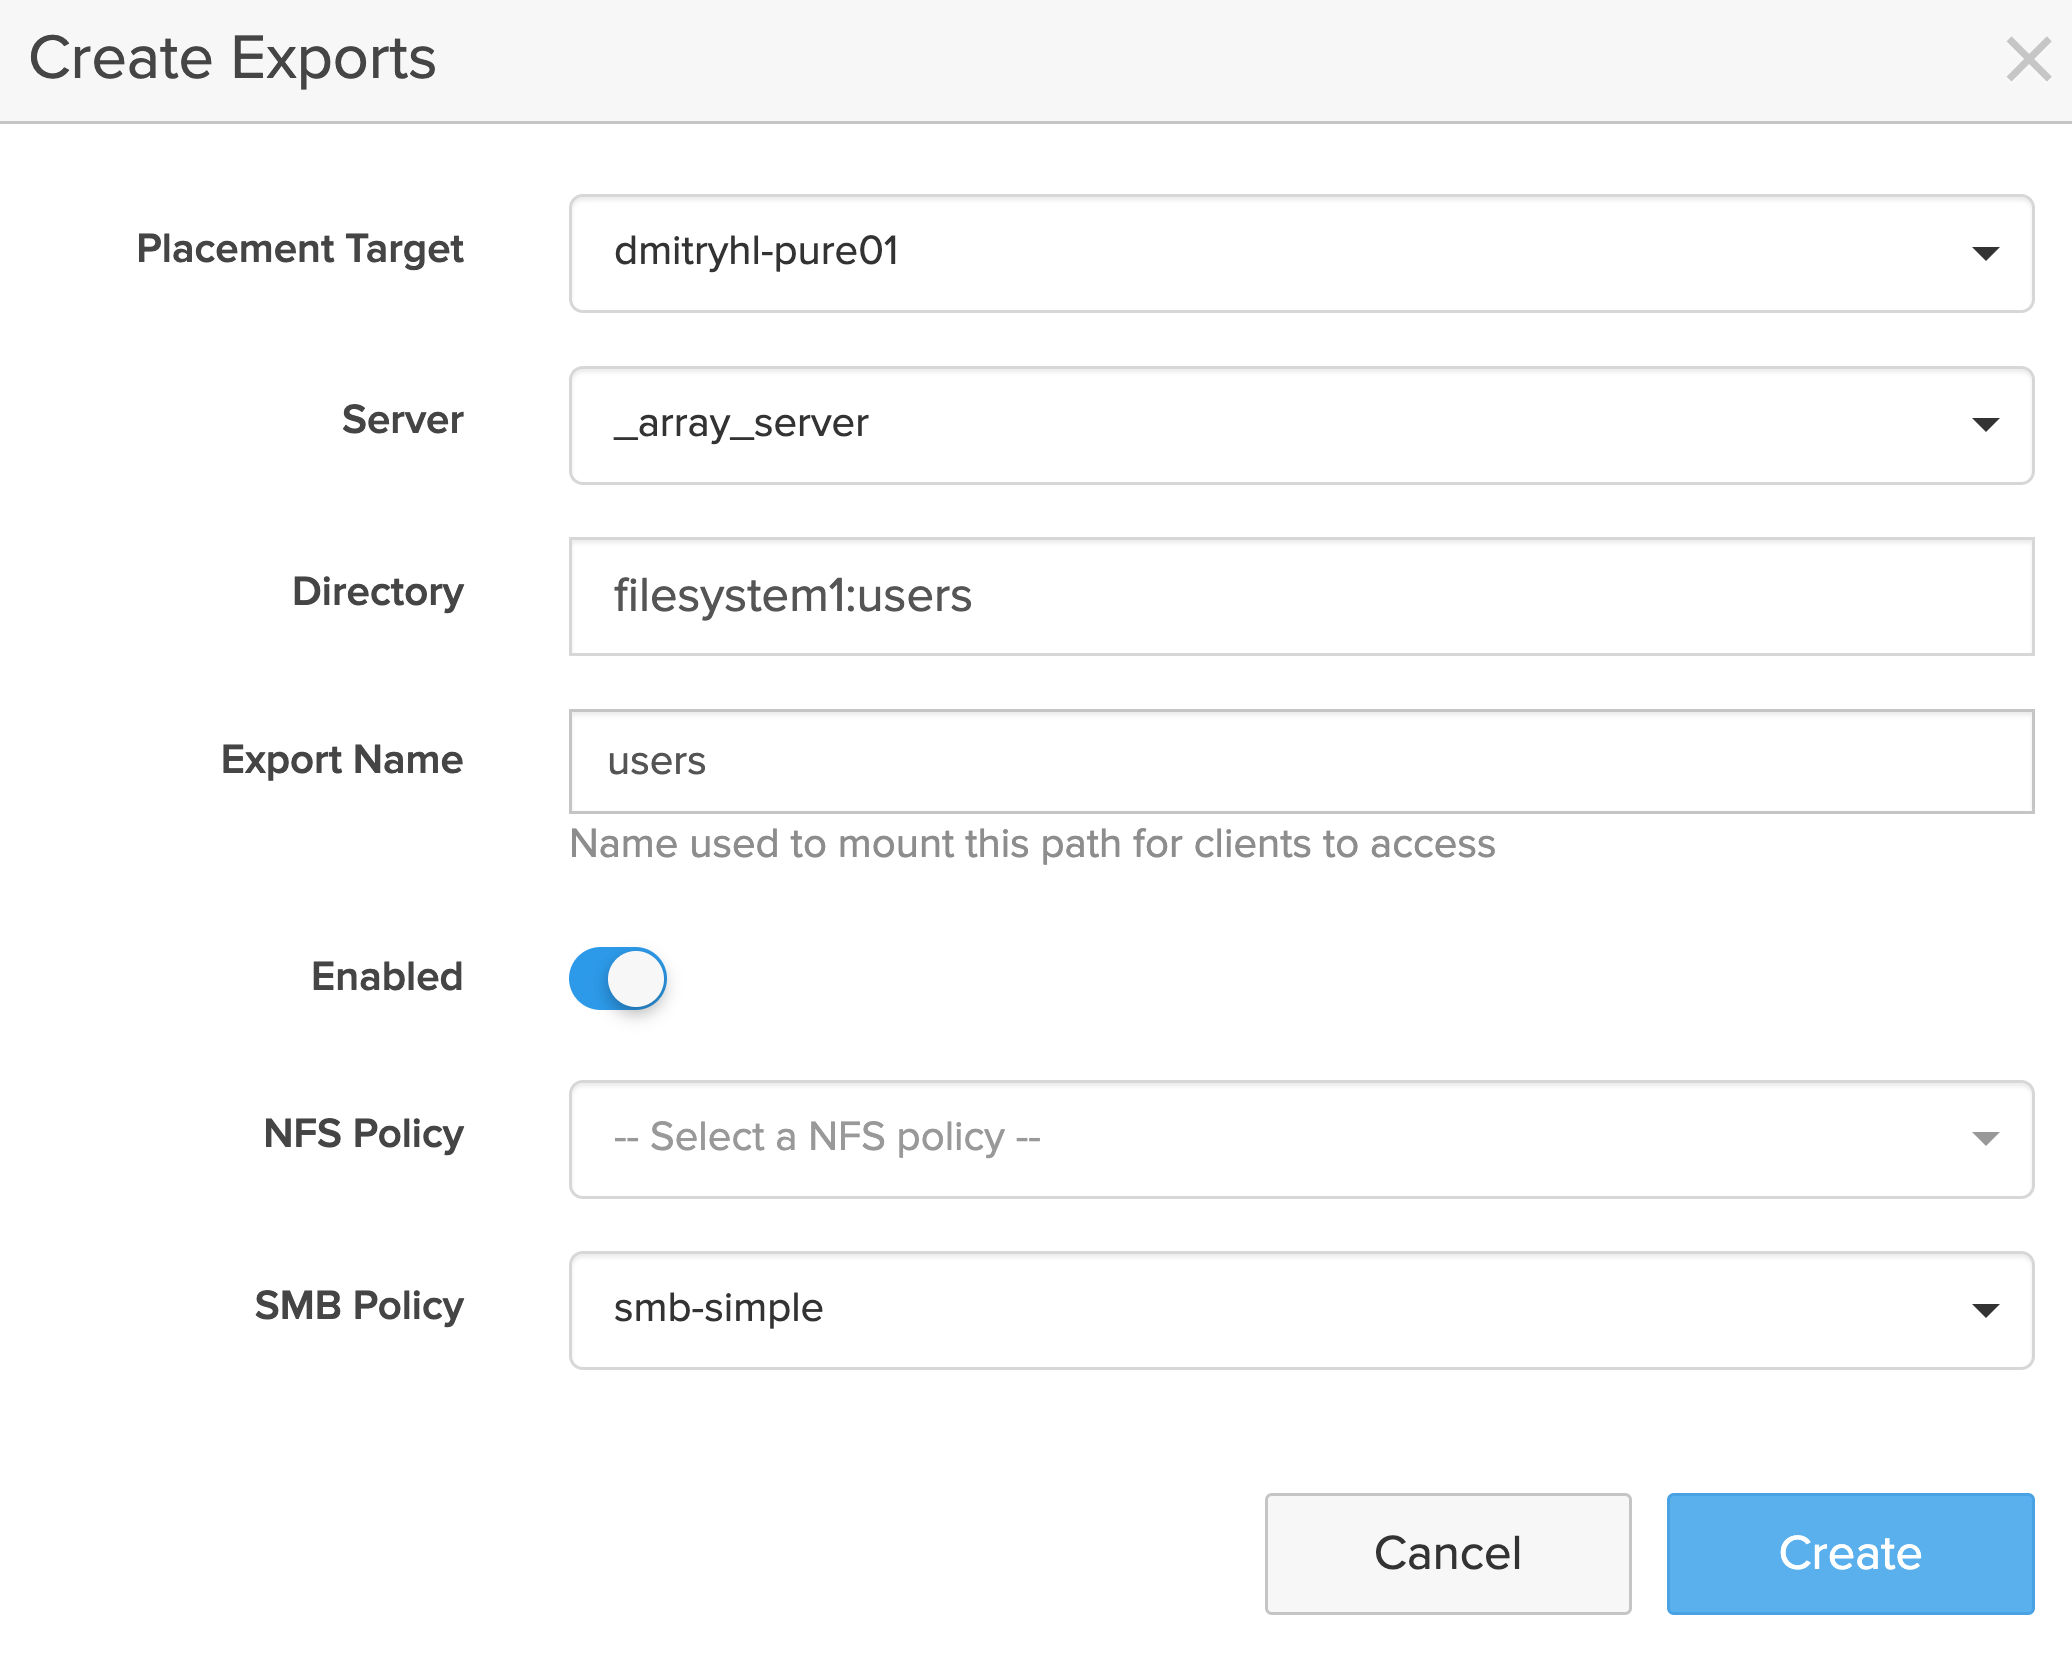
9. Create an Export
The export makes the managed directory accessible to clients over the network.
GUI Method:
Navigate to Storage > Policies > Export Policies.
Select an existing policy (e.g., a standard SMB or NFS policy) or create a new one.
Within the policy view, click the plus sign (+) to add an export.
Select your Managed Directory, choose the appropriate Server (use
_array_serverfor standard configurations), and provide an Export Name (this is the name clients will use to mount the share).
CLI Method: Use the following command:
puredir export create --dir <file-system-name>:<directory-name> --policy <policy-name> --server <server-name> --export-name <client-facing-name>.
A quick validation step
At this point, it is worth validating access from a client system. Map the SMB share and perform a simple set of operations—create files, read data, and verify permissions. This is less about testing performance and more about confirming that networking, authentication, and access controls are behaving as expected.
In most cases, if the earlier steps around DNS and Active Directory were done correctly, this validation step is uneventful, which is exactly what you want.
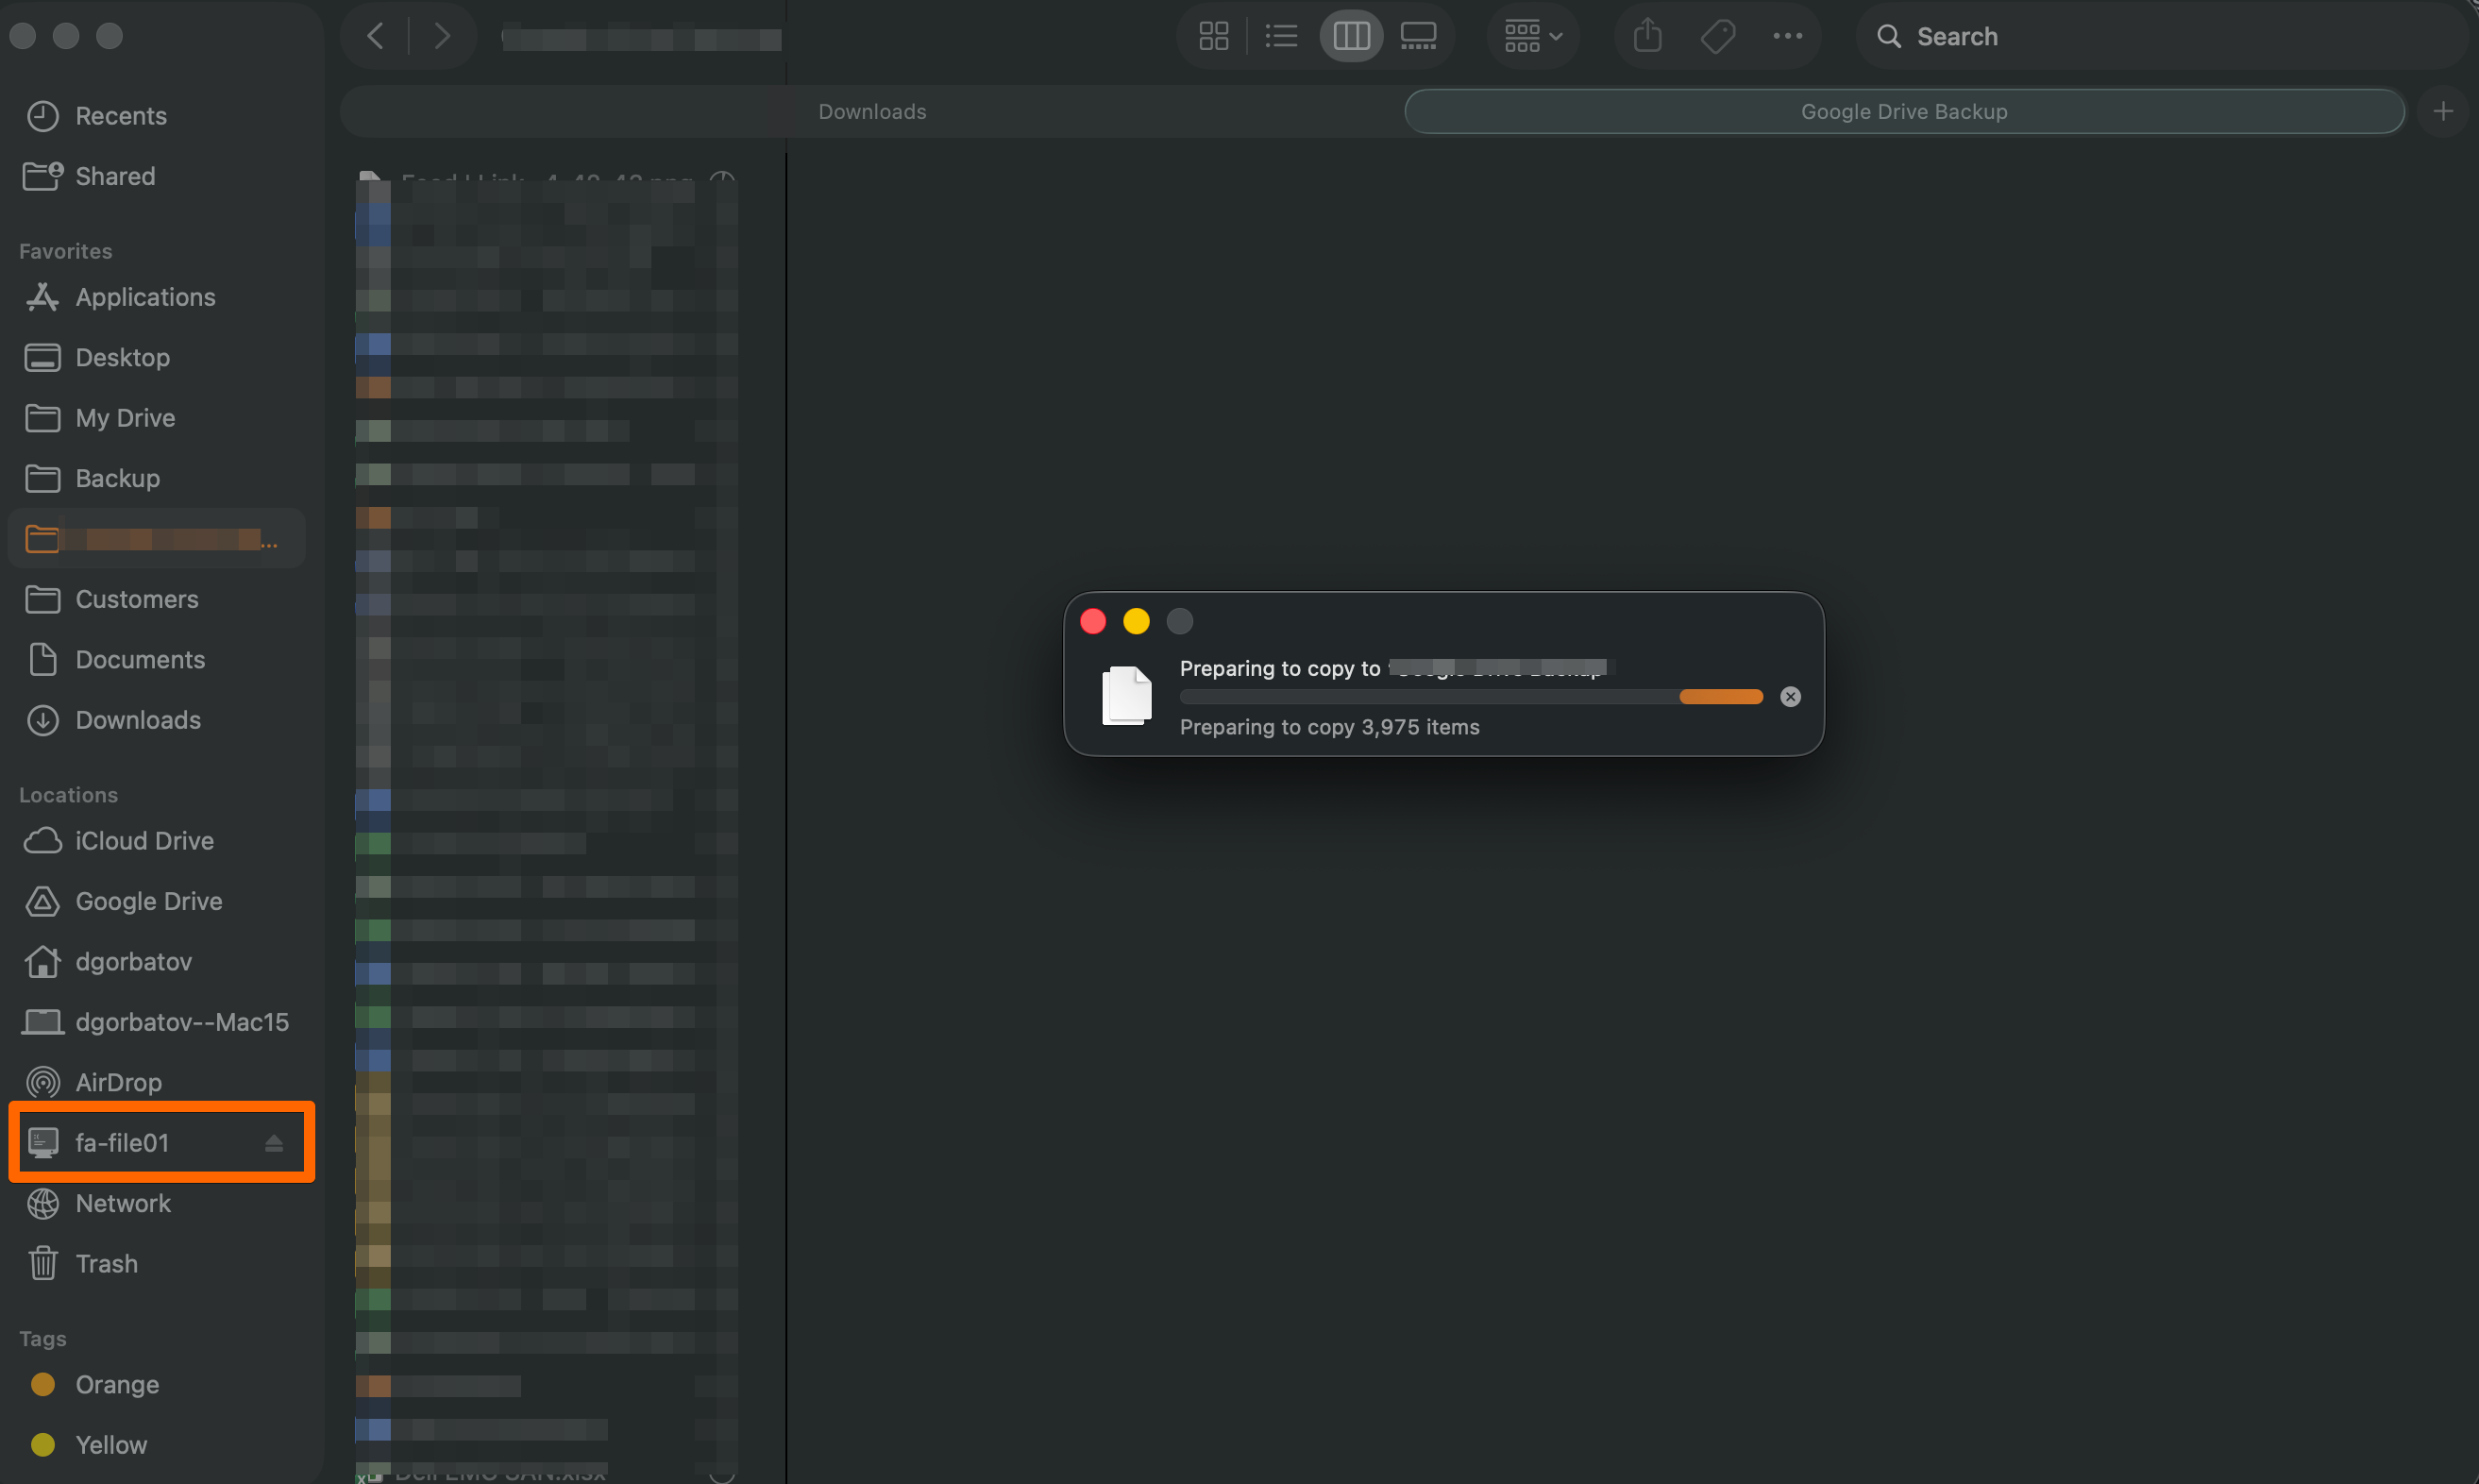
And now let the data migration begin.
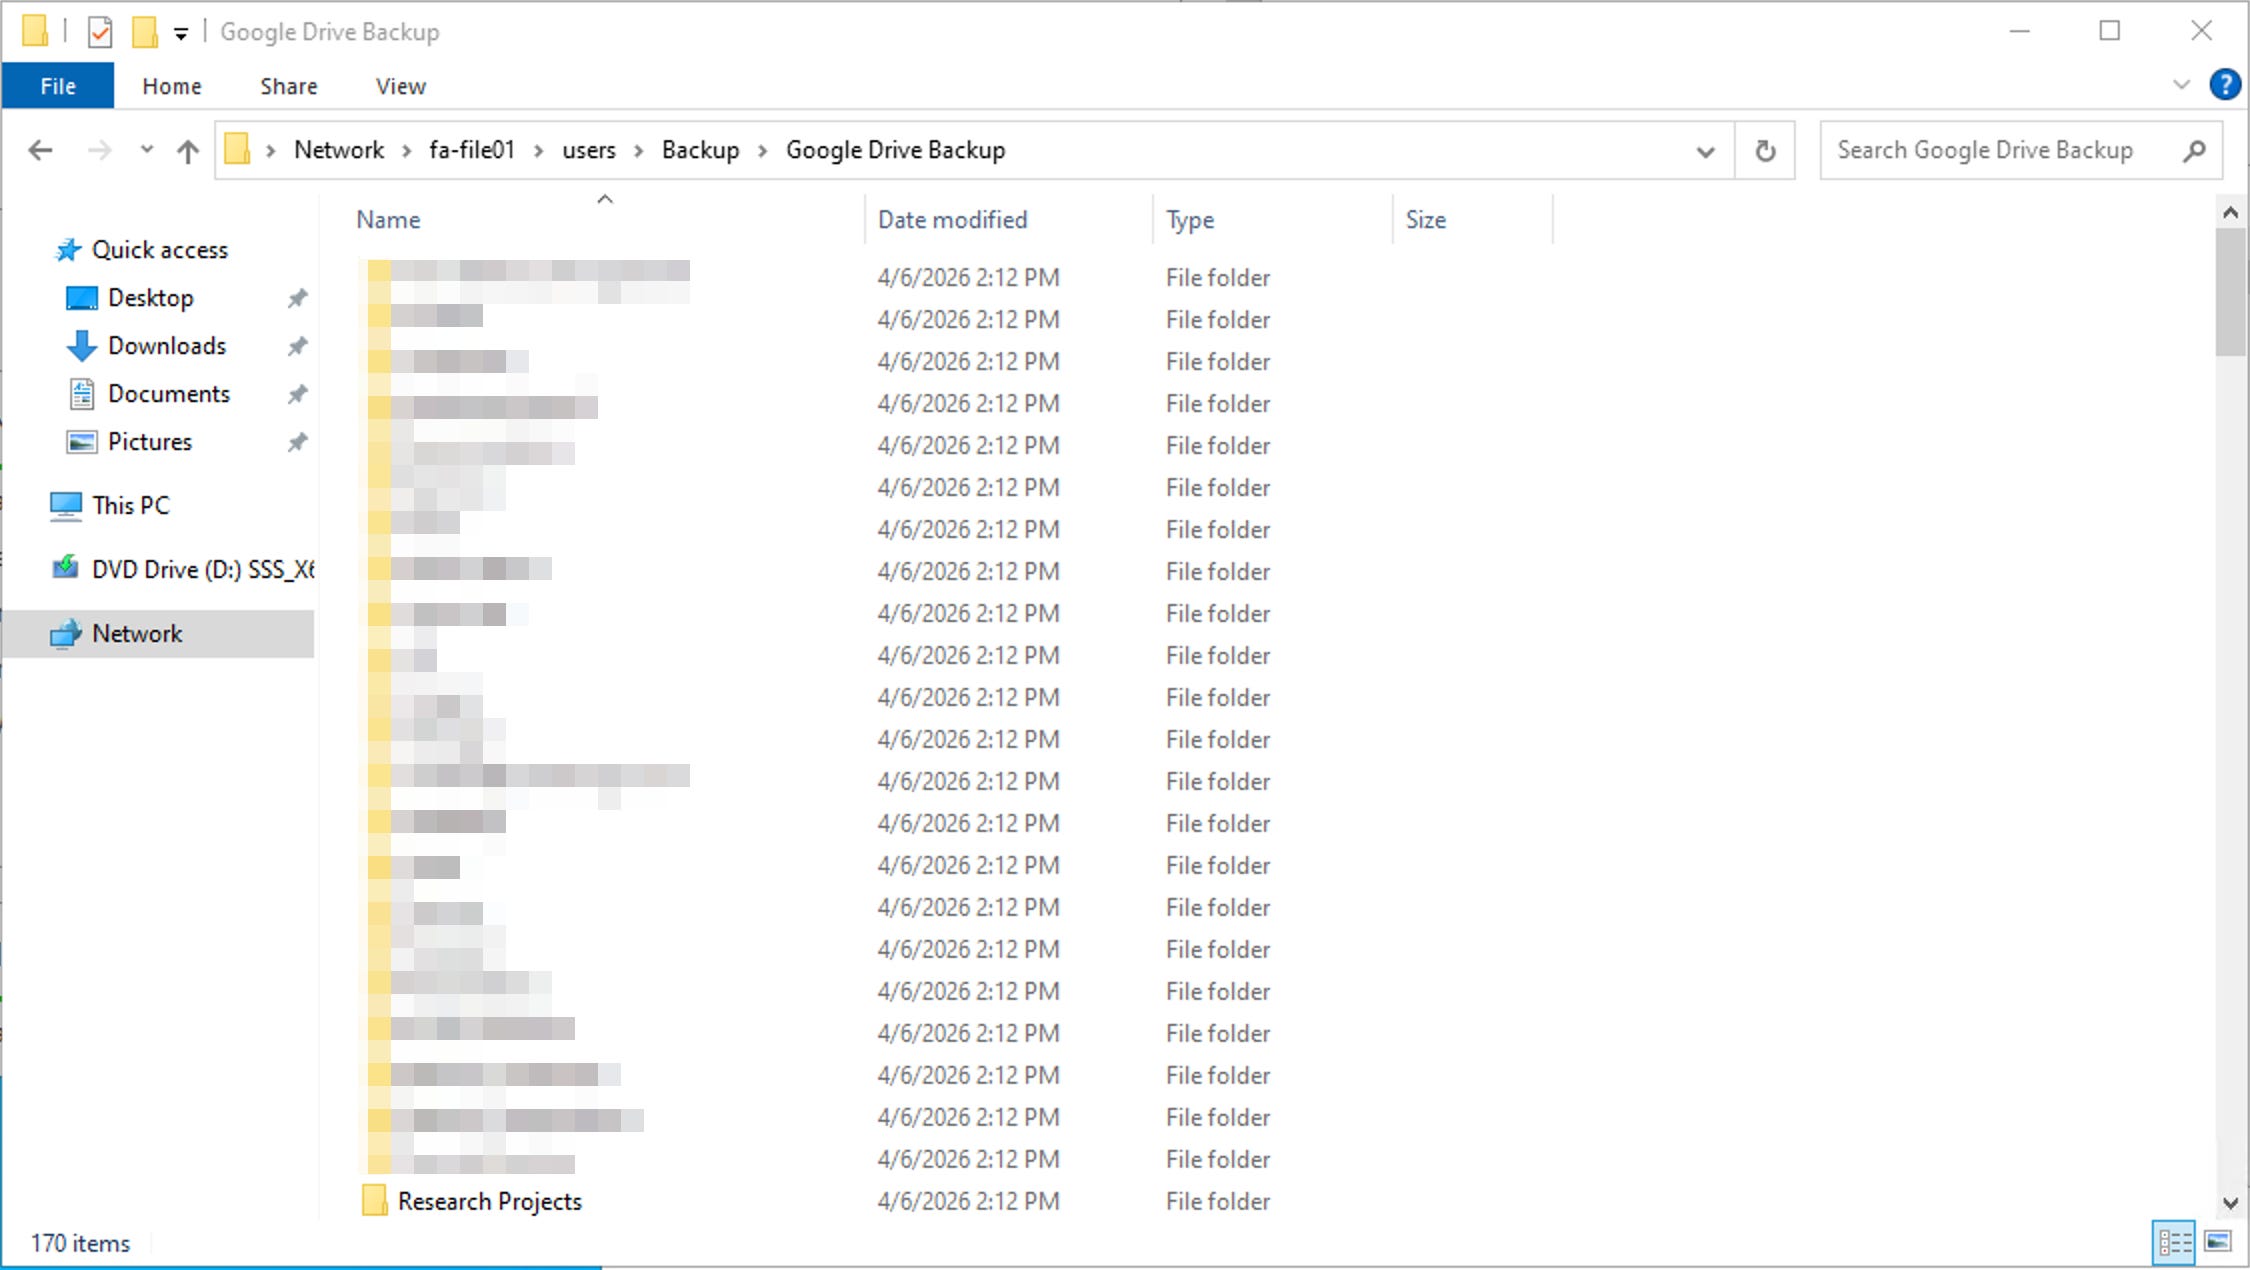
I am actually doing it from my Mac. And it just works!!!
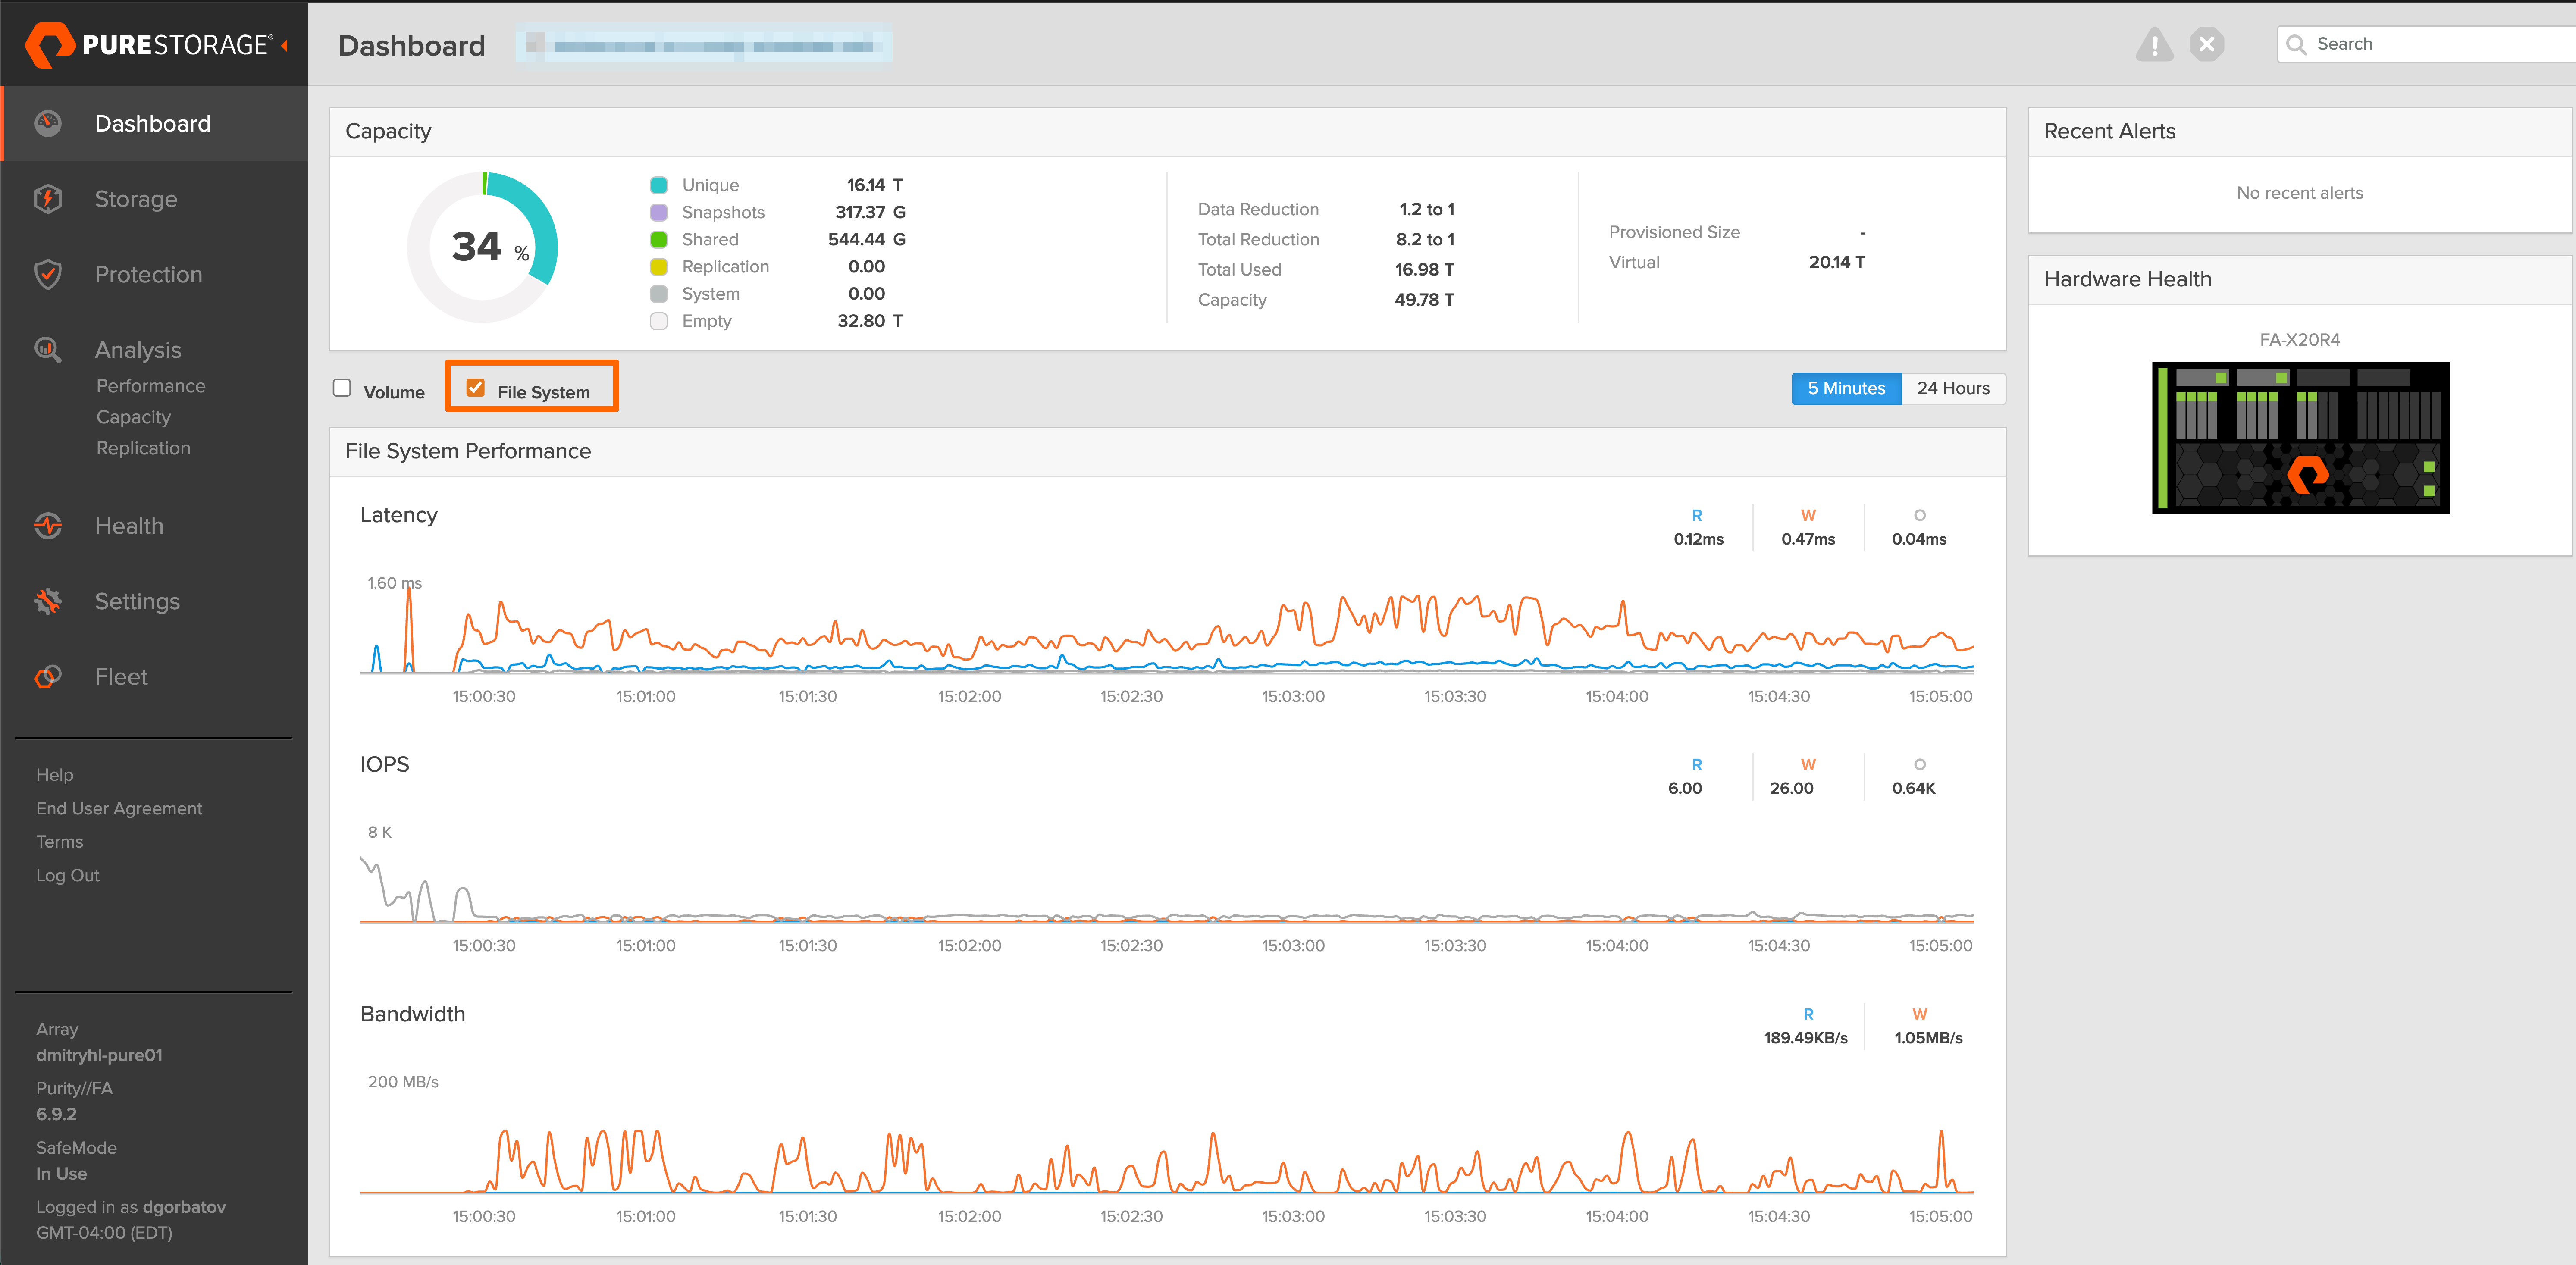
What becomes apparent after completing these steps is how little effort is required to stand up a fully functional file platform on infrastructure that is already in place.
Unless, of course, your NTP server crashed.
The system behaves predictably, integrates cleanly with existing services, and avoids many of the operational burdens associated with VM-based file servers.
And that is where things start to get interesting.
Because everything described so far is still being done manually—selecting where things live, defining configurations, and applying policies one step at a time. It works, and it works well, but it also mirrors the way storage has traditionally been managed.
In the next post, I will show what happens when you stop doing these steps manually and let Pure Fusion handle placement, policy, and provisioning instead.
Appreciate you reading.
Dmitry Gorbatov
© 2025 Dmitry Gorbatov | #dmitrywashere